How to Weather Proof Wood Step by Step
To weatherproof wood effectively, you’ll want to follow a few essential steps to ensure it stays protected against the elements. Weatherproofing is crucial for maintaining the integrity and longevity of your wood surfaces. This process involves cleaning, sealing, and ongoing maintenance to keep your wood looking great and lasting long.
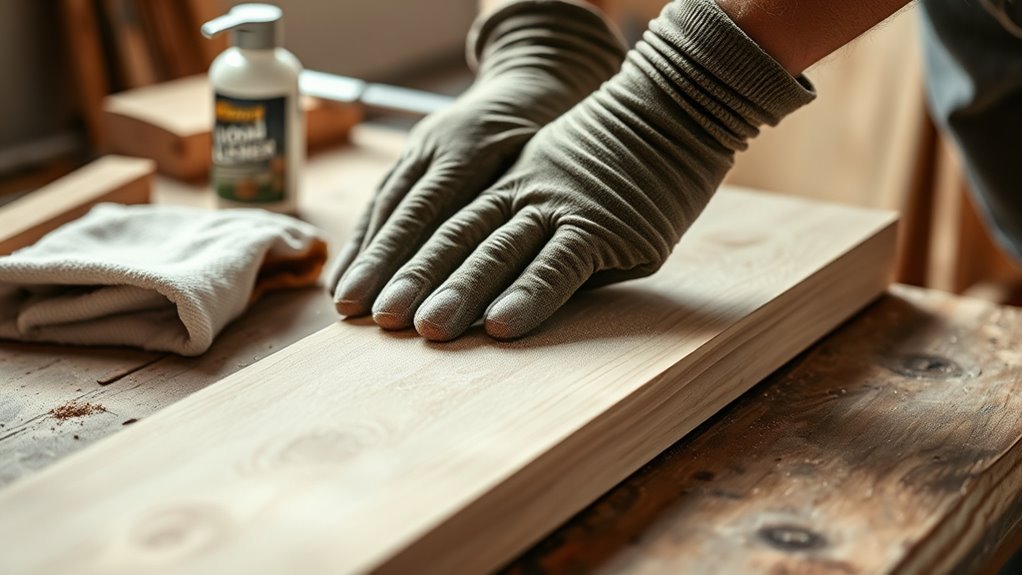
To start, thoroughly clean and dry the wood. This means removing any dirt, mold, or old finish that may be lingering on the surface.
Next, sand the surface smooth.
Then, apply a suitable waterproof sealant evenly using a brush or sprayer, making sure to cover all edges and ends.
Remember to use thin coats and allow each one to dry before applying another.
Maintaining proper temperature and humidity while the sealant cures is vital for achieving the best results.
Lastly, don’t forget to regularly inspect and reseal your wood to keep it protected.
Keep exploring to master every step for long-lasting durability!
Preparing Wood for Weatherproofing
Before you apply any weatherproofing treatment, you need to prepare the wood properly to make certain of the best results.
Start by sanding the wood surface thoroughly to remove old coatings, dirt, and rough spots. This creates a smooth base for new coatings to adhere evenly.
Begin by sanding the wood to remove old finishes and create a smooth surface for new coatings.
Next, clean the wood using a specialized cleaner or a gentle mix of water and mild detergent to eliminate dust, mildew, and debris.
After cleaning, allow the wood to dry completely—usually 24 to 48 hours.
Before proceeding, check the moisture content with a moisture meter; it should be below 15% to ensure sealants stick well.
Finally, remove any nails, screws, or loose fibers that might interfere with applying coatings, ensuring a flawless finish.
Selecting the Right Waterproofing Products
When choosing waterproofing products, it’s important to match them to your wood’s intended use—whether that’s indoors or outdoors.
Outdoor products offer stronger protection against UV rays and moisture.
Oil-based sealants penetrate deeper for lasting water resistance, while water-based options dry quickly and clean up easily.
Pick finishes—transparent, semi-transparent, or pigmented—based on your wood type and its exposure.
And don’t forget to check the labels for water resistance ratings and compatibility!
| Product Type | Best For | Key Features |
|---|---|---|
| Oil-based Sealant | Outdoor Use | Deep penetration, durable |
| Water-based Sealant | Indoor/Outdoor | Quick drying, easy cleanup |
| Stains | Outdoor Use | Adds color, UV protection |
| Combination | Outdoor Use | Sealant + stain, versatile |
| Finish Types | Varies | Transparent, pigmented options |
Cleaning and Sanding the Wood Surface
Start by removing any dirt, mildew, or old finishes with a stiff brush and a good cleaner to get the wood completely clean.
Once dry, sand the surface smoothly with medium to fine-grit sandpaper to open the grain for better sealant absorption.
Finally, wipe away all dust to prepare the wood for a flawless weatherproof finish.
Removing Dirt and Mildew
Although it might seem straightforward, thoroughly cleaning your wood steps is essential to guarantee a lasting weatherproof finish.
Start by removing dirt and grime with a mild detergent mixed in water, scrubbing the wood surface gently.
If you spot mildew, mix one part bleach to three parts water and scrub with a stiff-bristle brush to eliminate it effectively.
After cleaning, rinse the wood surface thoroughly with clean water to remove any residue that could interfere with sealing.
Let the wood dry completely—usually at least 24 hours—before moving on.
Proper cleaning ensures the wood is free from contaminants that can trap moisture or cause damage, setting the stage for a smooth, durable weatherproof finish.
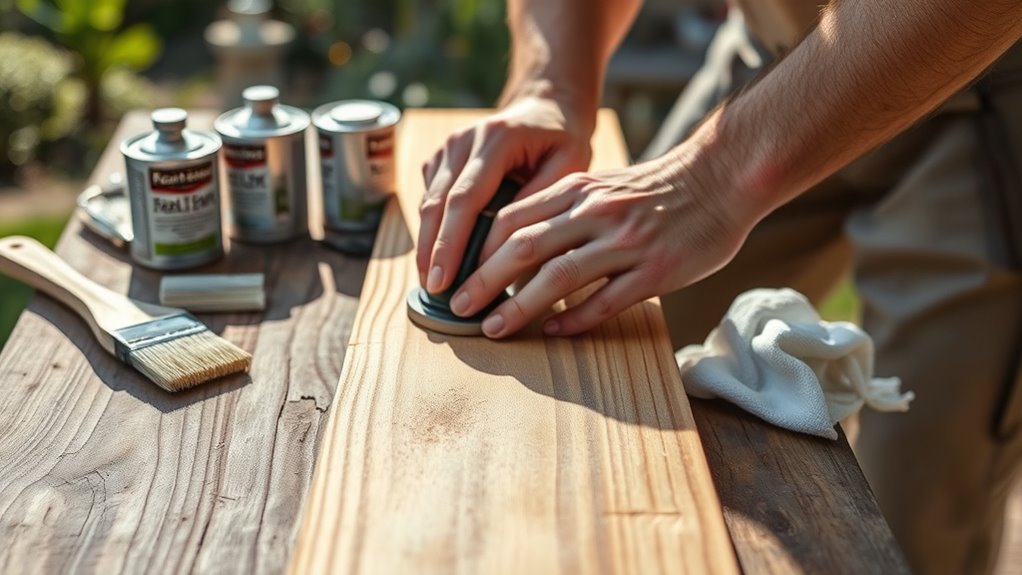
Sanding for Smoothness
After cleaning the wood surface thoroughly, it’s time for sanding to achieve smoothness.
Start with coarse-grit sandpaper (80-100 grit) to remove roughness and any old coatings. Then switch to medium or fine-grit sandpaper (120-220 grit) to refine the surface and prepare it for a flawless finish.
Always sand in the direction of the wood grain to avoid scratches and ensure evenness.
Once sanding is complete, wipe the wood surface with a damp cloth or tack cloth to remove dust. Effective dust removal is vital for a clean, smooth surface that will properly accept weatherproofing treatments.
This careful sanding process sets the foundation for a durable and attractive finish.
Preparing Surface for Sealant
Before applying any sealant, make sure you thoroughly clean the wood surface using a stiff-bristle brush and an appropriate cleaner to remove dirt, mildew, and old coatings.
Next, use sanding tools or a pressure washer to smooth out rough patches and remove loose paint.
Sand the wood with medium- or fine-grit sandpaper to open pores and enhance adhesion.
After sanding, wipe the surface with a damp or tack cloth to clear away dust.
Finally, ensure the wood is fully dry with no moisture before sealing.
| Step | Task | Purpose |
|---|---|---|
| 1 | Cleaning | Remove dirt, mildew, coatings |
| 2 | Pressure washing | Eliminate loose paint |
| 3 | Sanding | Smooth surface, open pores |
| 4 | Dust removal | Clear sanding debris |
| 5 | Drying | Prevent moisture under seal |
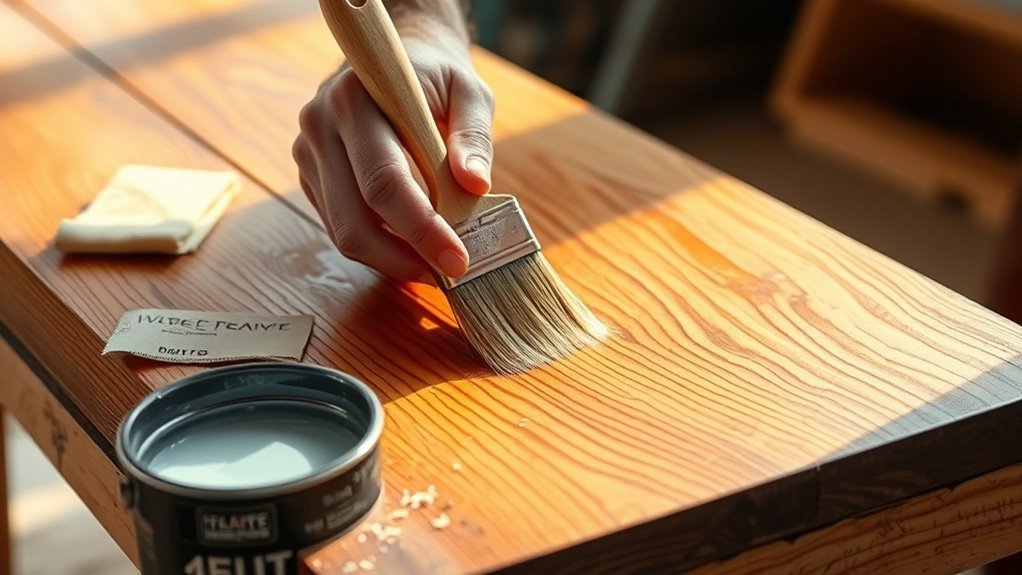
Applying Wood Sealers and Stains
You’ll want to pick the right sealer or stain based on whether your wood project is indoors or outdoors and the finish you prefer.
Apply each coat evenly with a brush, roller, or sprayer, working in manageable sections to prevent streaks.
Remember to let each coat dry completely before adding another to guarantee lasting protection.
Choosing Sealers and Stains
How do you choose the right sealer or stain for your wood project?
Start by considering your priorities: drying time, durability, and the final look. Water-based sealants dry faster and offer easier cleanup, while oil-based options penetrate deeper for longer-lasting protection.
Here’s what to keep in mind:
- Pick water-based or oil-based depending on how quickly you want your wood ready for use.
- Decide on transparent, semi-transparent, or pigmented finishes to match your style and protect against UV and moisture.
- Test the sealer or stain on a small area to check color and absorption before full application.
- Plan for at least two coats to ensure thorough protection, especially on high-traffic surfaces.
This careful selection establishes the foundation for effective weatherproofing.
Application Techniques and Tools
When applying wood sealers and stains, choosing the right tools and techniques guarantees a smooth, even finish that lasts.
Use brushes for detailed areas and rollers for large, flat surfaces to achieve consistent coverage.
Select brushes based on your product—synthetic for water-based finishes and natural bristle for oil-based ones.
During application, maintain a wet edge by working section by section to avoid streaks or visible lines.
Apply thin, uniform coats; multiple coats enhance water resistance and durability, so plan on at least two.
Always follow the manufacturer’s instructions for drying times between coats and ensure you’re applying within the recommended temperature range.
Proper use of tools and careful application techniques will help your weatherproofed wood stand up to the elements effectively.
Drying Times and Coats
Although drying times vary by product and weather, allowing 1 to 4 hours between coats guarantees proper absorption and prevents tackiness.
For effective waterproofing, follow these steps during your application:
- Apply thin, even coats to avoid extended drying time and uneven absorption.
- Usually, two coats are enough to ensure full protection.
- Consider environmental factors—high humidity or low temperatures can slow drying time.
- Allow a cure time of 24 to 72 hours before exposing the wood to moisture or heavy use.
Always check the manufacturer’s instructions for specific drying times and reapplication intervals.
Techniques for Even Sealant Application
To achieve a smooth, even sealant application, you’ll want to use a high-quality brush or roller.
Work in long, steady strokes that prevent streaks and overlaps.
Maintain a wet edge by overlapping each stroke before the previous one dries, ensuring seamless coverage.
Apply sealant in thin coats, ideally two or more, to promote uniform absorption and prevent drips.
Work in manageable 60 sq. ft. sections for controlled application.
For large or hard-to-reach spots, consider a sprayer for consistent coverage.
| Technique | Purpose |
|---|---|
| High-quality brush | Ensures smooth application |
| Long, steady strokes | Prevent streaks and overlaps |
| Overlapping strokes | Maintain wet edge |
| Thin coats | Avoid drips and pooling |
| Sectional work | Control coverage and drying |
Ensuring Proper Drying and Curing Times
Since proper drying and curing are essential for weatherproofing wood effectively, you should allow the surface to dry completely for at least 24 hours after cleaning before applying any treatments.
To guarantee success, follow these key steps:
- Check the weather forecast to avoid rain or moisture during drying and curing periods.
- Apply each coat only when the previous one is fully dry and cured—no tackiness or transfer upon touch.
- Maintain an environment with temperatures between 50°F and 85°F and low humidity for ideal drying.
- Allow sealants and finishes to cure for 2-3 days, or as per product instructions, before exposing wood to harsh elements.
Taking these steps ensures that your wood treatment will be effective and long-lasting!
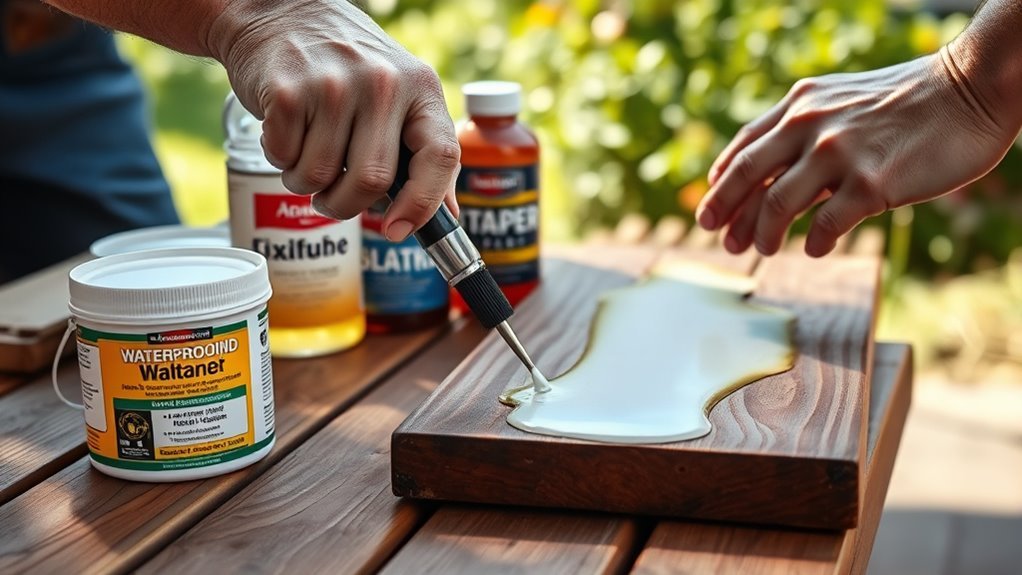
Protecting Wood Ends and Edges
After guaranteeing your wood has dried and cured properly, you’ll want to focus on protecting the vulnerable ends and edges.
Wood ends are especially prone to water penetration, so applying a waterproof sealant or specialized end grain sealer is essential.
Use a brush or spray to evenly coat all cut surfaces, making sure the protective coating penetrates at least 1/8 inch into the wood.
This creates a durable, water-resistant barrier that guards against moisture damage.
For areas exposed to heavy weather, consider using epoxy for enhanced waterproofing.
Remember to reapply your sealant annually or after heavy rain to maintain peak protection.
Taking these steps ensures your wood’s ends and edges stay strong and water-resistant over time.
Maintaining Waterproofed Wood Surfaces
How often should you check your waterproofed wood surfaces?
Regular maintenance is key to preserving water resistance and extending the life of your wood surfaces.
Follow these steps for effective upkeep:
- Inspect your wood surfaces every few months for wear or damage to the waterproofing.
- Clean the surface with mild detergent and water, then let it dry completely before reapplying sealant.
- Conduct splash tests by sprinkling water; if it soaks in within five seconds, it’s time to reseal.
- Choose dry, cloudy days with temperatures between 50°F and 85°F for sealant application, avoiding rain or high humidity.
Recognizing Signs That Reapplication Is Needed
You’ll want to check if water still beads on the wood’s surface.
If it soaks in within five seconds, it’s time to reapply.
Look for signs like fading, cracks, or peeling that show the finish is wearing down.
Regularly testing for absorption and spotting visible wear will help you keep your wood properly protected.
Water Beading Test
When water beads up and rolls off your wood surface within seconds, it shows that your waterproofing is still holding strong.
To check this, perform a simple water beading test periodically. Here’s how to interpret it:
- Sprinkle or pour water onto the wood surface.
- Observe if water forms beads and rolls off quickly.
- If water absorption occurs or beads no longer form, it signals your waterproofing coating is wearing down.
- When beading fades, it’s time for reapplication to maintain durability and protection.
This test helps you recognize when your wood’s weatherproofing needs revitalizing.
It ensures long-lasting defense against moisture and damage.
Keep an eye on water beading to catch early signs of wear and avoid costly repairs.
Surface Absorption Check
Although water beading offers a quick glimpse of your wood’s protection, performing a surface absorption check reveals deeper signs that reapplication is needed.
Start by doing a water bead test—sprinkle a few drops on the wood surface. If water beads up and rolls off, your waterproofing still works.
But if water absorption happens within five seconds, it signals the finish has worn down, and you need reapplication.
You should also measure the wood’s moisture content with a moisture meter; readings above 15% mean the wood is absorbing too much moisture, indicating it’s time to reseal.
Keep track of when you last applied waterproofing, as reapplication is typically needed every 2-3 years or sooner if signs of water absorption appear.
Visual Wear Indicators
If your wood’s finish looks dull or faded, it often means the protective layer has worn down and needs resealing.
To know when to reapply waterproofing, watch for these visual wear indicators:
- Cracks or peeling in the coating signal the barrier is broken and must be renewed.
- Color change or uneven spots suggest the finish is compromised and losing protection.
- Signs of water damage or mold growth show the wood is vulnerable and needs immediate attention.
- Loss of water beading, with water soaking in quickly, means the waterproofing has worn off.
Tips for Enhancing Longevity and Durability
To enhance your wood’s longevity and durability, you should apply a high-quality waterproof sealer or stain every 2-3 years to protect it from moisture and UV damage.
Proper waterproofing is key to outdoor wood protection.
You can also boost durability by choosing rot-resistant wood and ensuring good water drainage through raised or slatted installation designs.
Regular cleaning to remove debris prevents mold buildup, maintaining your wood’s strength.
| Tip | Action | Benefit |
|---|---|---|
| Waterproofing | Apply sealer/stain every 2-3 years | Protects from moisture & UV damage |
| Installation Design | Use raised/slatted setups | Enhances water drainage |
| Wood Choice | Select rot-resistant species | Improves long-term durability |
| Maintenance | Clean regularly, remove debris | Prevents mold & mildew |
Frequently Asked Questions
What Is the Easiest Way to Weatherproof Wood?
The easiest way to weatherproof wood is to apply a high-quality penetrating oil or stain sealant.
First, you’ll want to clean and sand the surface.
Then, apply the product on a cool, cloudy day for best results.
This will help ensure that you achieve optimal protection for your wood.
How to Stop Wood Rotting Outside?
Stop stubborn sapwood from spoiling by sealing surfaces swiftly.
You’ll want to clean and coat with waterproof sealant.
Also, elevate your wood and guarantee excellent drainage.
Regularly reapply treatments to keep rot and ruin at bay.
Can You Make Wood 100% Waterproof?
You can’t make wood 100% waterproof because it’s naturally porous.
However, you can apply multiple sealant coats and use protective barriers to greatly reduce water absorption.
This helps protect wood from damage in most outdoor conditions.
Can You Seal Regular Wood for Outdoor Use?
Yes, you can seal regular wood for outdoor use, increasing its lifespan by up to 50%.
Just clean, sand, and apply multiple coats of waterproof sealant with UV protection.
Don’t forget to maintain it regularly for best results.
Conclusion
By weatherproofing your wood, you’re wrapping it in a shield against nature’s fiercest storms.
Think of it as giving your wood a raincoat that never quits, guarding against moisture’s sneaky attacks and the sun’s harsh glare.
With the right prep, sealants, and care, your wood won’t just survive—it’ll thrive.
It will stand strong like a steadfast guardian.
Keep an eye out for wear, and your efforts will pay off.
By weatherproofing your wood, you’ll preserve its beauty and strength season after season.
In conclusion, weatherproofing wood is essential for protecting it from the elements.
With proper preparation, sealants, and regular maintenance, your wood can endure harsh weather and maintain its appeal.
So, invest the time and effort to weatherproof your wood, ensuring it remains a durable and attractive feature in your space for years to come.