10 Easy Steps to Replace Weather Stripping on Your Garage Door
First, gather tools like a utility knife, screwdriver, and new weather stripping that matches your door’s size.
Inspect the old strip for damage, then raise and secure the garage door at a comfortable height.
Carefully remove the old weather stripping and clean the channel thoroughly.
Once it’s clean, install the new strip snugly.
Trim any excess for a tight fit, then test the seal by closing the door.
Regular checks help keep it working well—explore more for detailed tips and tricks.
Gather Necessary Tools and Materials
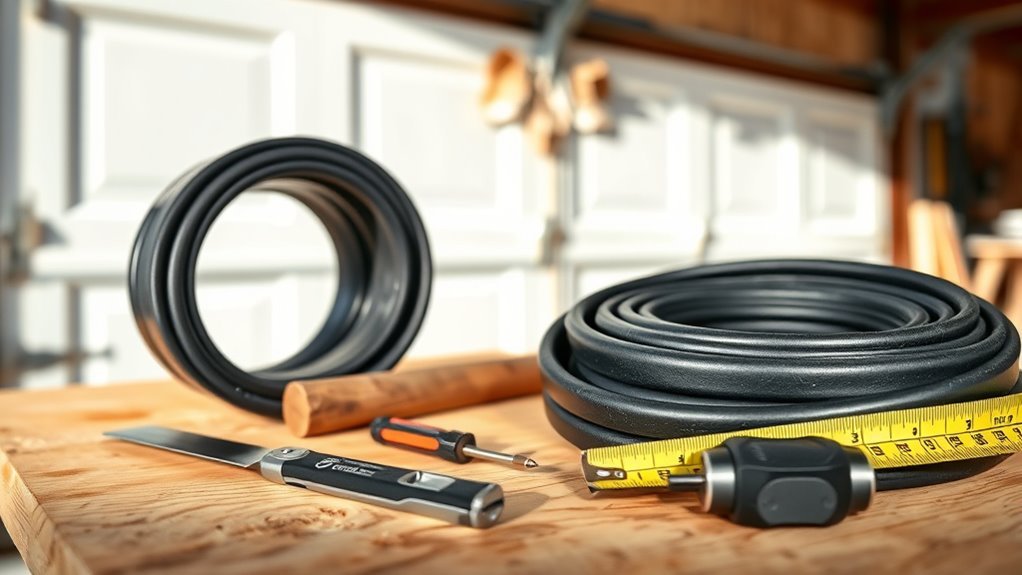
Before you begin replacing your garage door weatherstripping, gather all the necessary tools and materials to streamline the process.
Start by selecting a new weatherseal that matches your door’s width and groove size. This ensures a perfect fit for maximum energy efficiency.
Choose a weatherseal that fits your door’s width and groove for optimal energy efficiency.
Essential tools include a utility knife, screwdriver or drill, measuring tape, and heavy-duty adhesive if your repair requires it.
Don’t forget work gloves to protect your hands and provide a firm grip during garage door maintenance.
A clean cloth will help you wipe down the channel, removing dirt or old adhesive to prepare for the new seal.
Safety equipment like protective eyewear is also vital when cutting or handling tools.
Having everything ready will make your weatherstripping repair quick and effective.
Inspect Your Current Weather Stripping
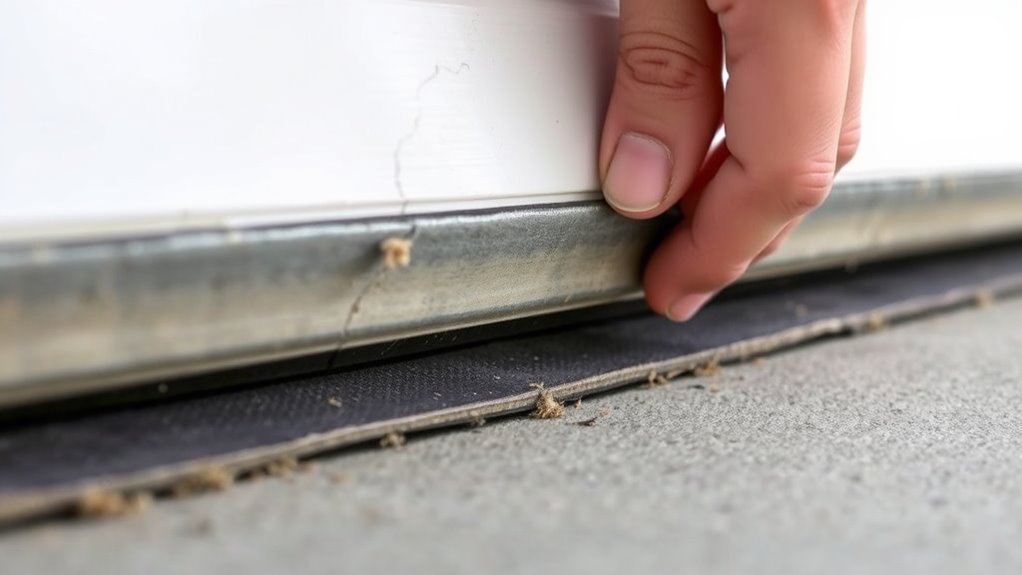
Once you have your tools and materials ready, take a close look at the weather stripping on your garage door to determine its condition.
Start by visually inspecting the bottom edge for cracks, tears, or missing sections of weatherseal.
Check for gaps or leaks when the door is closed, focusing on the sides and bottom.
Remove any dirt or debris from the weatherseal to get a clear view.
Look closely for signs of warping, hardening, or brittleness—these indicate the weatherstrip needs replacement.
Use a flashlight to examine hard-to-see areas for hidden damage or deterioration.
This careful inspection helps you decide if the weatherseal is still effective or if it’s time for a new one to keep your garage sealed and protected.
Raise the Garage Door to a Comfortable Height
Raise your garage door to a height that lets you comfortably reach the bottom seal area.
Use the opener if you have one, or lift it carefully by hand while keeping it stable.
Always secure the door in place before starting to avoid any accidents.
Optimal Door Positioning
Because you need easy access to the bottom seal, position your garage door at a height where you can comfortably reach the weatherstripping without straining.
Fully raise the door to ensure enough clearance for removing and installing the garage door weatherstripping.
Use your garage door opener or manually lock the door to keep it securely in place while you work.
Make sure the door is stable and level to prevent any shifting or accidental falls during the replacement process.
If needed, adjust the door height to line up with your work surfaces or tools, allowing for precise measurement and installation.
Proper door positioning not only makes the job easier but also guarantees the new weatherstripping fits perfectly for effective sealing.
Safety Precautions
Before you start working on the weather stripping, make sure you position the garage door at a comfortable height that gives you easy access to the bottom seal.
This safety precaution helps you avoid strain and guarantees stability.
Always fully open the door and secure it using locking pliers or a prop to prevent accidental movement.
Don’t forget to disconnect the garage door opener or engage manual locks to avoid unintended lowering.
Wearing protective gloves and eyewear adds an extra layer of safety.
| Step | Action | Safety Tip |
|---|---|---|
| Raise Door | Position at comfortable height | Prevents strain and improves access |
| Secure Door | Use locking pliers or props | Avoids accidental door movement |
| Disconnect Opener | Disable opener or use manual lock | Stops unexpected door lowering |
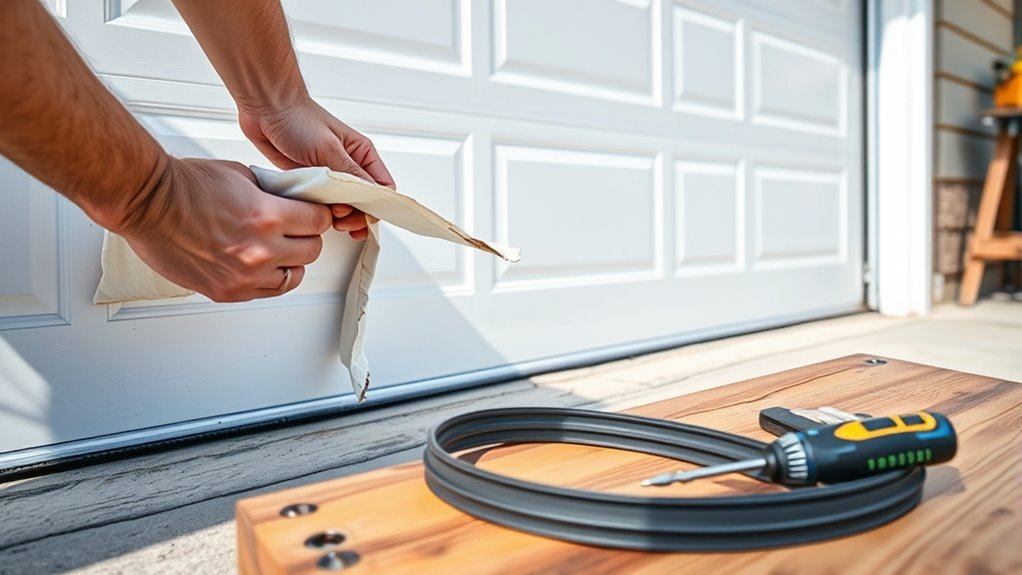
Remove the Old Weather Stripping
Before you start, put on work gloves to protect your hands from sharp edges and debris.
Open the garage door and locate the old weather stripping along the bottom track.
Gently pull it away, using a utility knife or screwdriver to remove any nails or fasteners without damaging the door.
Safety Precautions First
When you remove the old weather stripping, always wear work gloves to protect your hands from sharp edges on the garage door or the strip itself.
Safety precautions are vital to avoid injury and damage during this step.
Make sure your garage door is fully open or securely held in place to prevent accidental movement.
Gently pull or pry the weather stripping free from its track, applying slow, steady pressure.
If adhesive or fasteners hold it in place, carefully use a utility knife or screwdriver to loosen them.
Remove the strip completely, then inspect the metal track or retainer for any damage before moving on.
Following these safety precautions helps guarantee a smooth, safe removal process.
Locate Weather Stripping
Although it might seem straightforward, locating and removing the old weather stripping requires careful attention.
Start by inspecting the bottom edge of your garage door to find the existing weather seal.
It’s usually a rubber or vinyl strip attached to the door or track.
Put on work gloves to protect your hands from sharp edges or debris.
If the weather seal is simply held in place by a retainer or channel, gently pull it away.
You might need a flat-head screwdriver to loosen it carefully.
When nails or screws secure the strip, use the appropriate tools to remove those fasteners before pulling out the seal.
After removal, check the channel or retainer’s condition to make sure it’s clean and ready for the new weather stripping installation.
Gentle Removal Techniques
Since old weather stripping can be stubborn, you’ll want to wear work gloves and apply steady, even pressure as you gently pull it away from the metal track.
This helps avoid tearing the seal or damaging the door. If sections resist, use a utility knife or putty knife to carefully loosen the weatherstripping embedded in the retainer or track.
Don’t rush—taking your time helps prevent damage to the metal track, ensuring a clean surface for the new weatherstripping.
If the stripping still won’t budge, apply a silicone-based lubricant along the edges to loosen any adhesive or dirt.
By using these gentle removal techniques, you’ll protect both the door and the weatherstripping.
This makes your replacement job smoother and more effective.
Clean the Weather Stripping Channel
To guarantee your new weatherstripping seals effectively, you’ll need to clean the weather stripping channel thoroughly before installation.
Start by using a damp cloth or brush to remove dirt, dust, and debris along the bottom and one side of the channel.
Begin by wiping away dirt and debris from the channel using a damp cloth or brush.
Apply mild cleaner or soapy water to loosen grime.
If you notice old adhesive or paint buildup, carefully scrape it away with a plastic scraper—not a sharp utility knife—to avoid damaging the garage doors.
Use a vacuum or compressed air to clear loose particles, ensuring a smooth surface for the new weatherstripping to adhere properly.
Taking these simple steps will help keep your garage door sealed tightly, reduce energy bills, and extend the life of your weather seals.
This will also make garage door repair easier when you need to replace the old seal.
Measure and Cut the New Weather Stripping
After thoroughly cleaning the weather stripping channel, you’re ready to measure and cut your new weather stripping.
Start by opening your garage door fully and using a tape measure to get the exact length of each side of the door opening.
Next, grab a T-square or straight edge to mark these measurements clearly on the weather stripping.
Make sure to add about ½ inch extra on each end to allow for trimming later.
When cutting, use a sharp utility knife or scissors to ensure clean, straight edges, which help the weather stripping fit snugly.
Before you cut, double-check all your measurements to avoid gaps or poor sealing that could compromise your garage’s insulation.
Accurate measuring and cutting are key to a successful replacement.
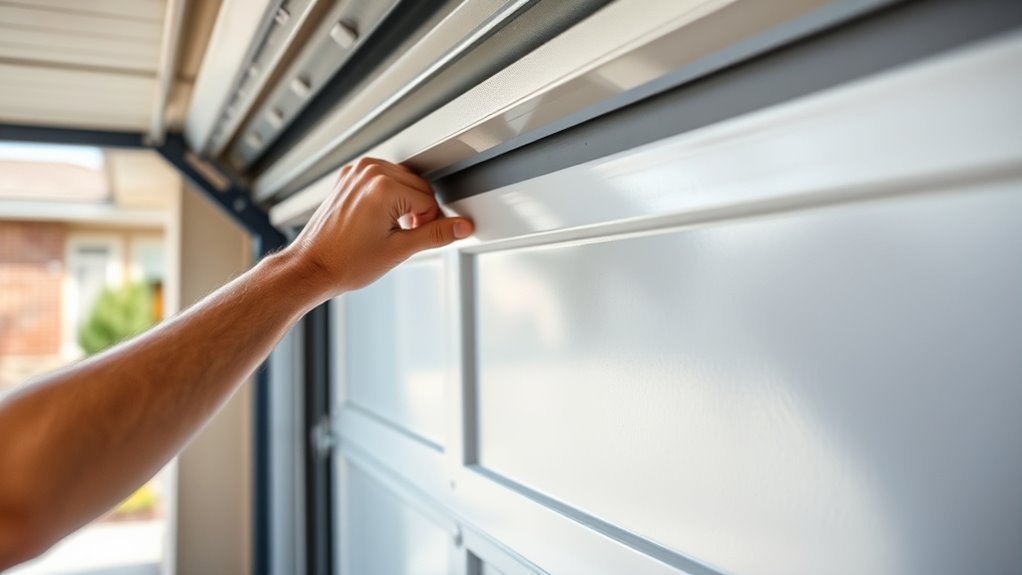
Install the New Weather Stripping Into the Channel
When you slide the new weather stripping into the channel, make sure it fits snugly from one end to the other.
Start at one end of the garage door and carefully insert the strip into the groove, ensuring it seats evenly without gaps.
Use your fingers or a blunt tool to press the weather stripping firmly into place along the entire length of the channel.
If the channel is tight, gently wiggle or flex the strip to help it slide in without damage.
Work gradually, adjusting as needed to eliminate bulges.
Confirm the weather stripping is securely seated and flush with the door’s channel before moving on.
This ensures an effective seal that will keep out drafts and moisture.
Trim Excess Weather Stripping for a Perfect Fit
Now that your weather stripping is in place, it’s time to trim the excess for a perfect fit.
Use a utility knife or electric scissors to cut carefully, leaving about half an inch on each side and checking the alignment as you go.
Make sure you trim evenly without stretching to keep the seal tight along the entire edge.
Proper Cutting Techniques
Although trimming weather stripping might seem straightforward, using proper cutting techniques guarantees a perfect fit and prevents gaps.
To get it right, follow these key steps:
- Use sharp scissors, utility knives, or electric scissors for clean, precise cuts without jagged edges.
- Measure and mark the exact length before cutting to ensure the weather stripping fits perfectly across your garage door.
- Leave about 1/2 inch of excess on each end to allow for adjustments and avoid gaps.
- Trim slowly and carefully, frequently checking the fit to prevent cutting too much.
- Always cut on a stable surface and wear safety gloves to protect your hands during the process.
These tips help you achieve a neat, secure seal that keeps your garage insulated and protected.
Ensuring Even Alignment
To achieve a perfect fit, trim the excess weather stripping carefully using a utility knife or electric scissors.
Leave about half an inch on each side for adjustments. Make sure the cut ends are straight and even to avoid gaps that let drafts or water in.
After trimming, close the garage door gently to test the seal. Check that the weather stripping aligns evenly along the entire bottom edge without bunching or gaps.
If needed, trim small amounts until it fits snugly from jamb to jamb. Confirm that the weather stripping slightly overlaps the threshold seal to ensure maximum protection.
This careful alignment guarantees a tight seal, keeping your garage insulated and secure against the elements.
Test the Garage Door Seal and Operation
Once you’ve installed the new weather stripping, you’ll want to close the garage door and carefully check for any gaps or light leaks to guarantee a tight seal.
Next, observe the door’s movement to ensure the stripping doesn’t cause resistance or interfere.
Confirm the bottom seal compresses evenly, creating an airtight and watertight barrier.
Watch for any tearing, shifting, or detachment during operation, adjusting if needed.
To maintain effectiveness, regularly test the seal by feeling for drafts or water intrusion after storms.
Here’s what to focus on:
- Inspect for gaps or light leaks when door is closed.
- Ensure smooth door movement without resistance.
- Verify even compression of the bottom seal.
- Check for damage or shifting of stripping during use.
- Feel for drafts or moisture intrusion over time.
Schedule Regular Inspections and Replacements
After confirming your garage door seal is working properly, it’s important to keep up with regular inspections and timely replacements.
Check the weather stripping every 6 to 12 months for cracks, tears, or warping.
Conduct seasonal inspections, especially before winter and summer, to ensure the seal remains effective against drafts and energy loss.
Replace the weather stripping every 2 to 3 years to maintain maximum efficiency.
Use quick visual inspections to spot any damage that could compromise your garage’s weatherproofing.
Keep a maintenance log to track inspection dates and replacements.
This proactive approach helps you avoid costly repairs and keeps your garage comfortable year-round.
Staying consistent with inspections and replacements ensures your garage door performs at its best.
Frequently Asked Questions
Can the Rubber Strip on the Garage Door Be Replaced?
Yes, you can replace the rubber strip on your garage door.
Just measure the old strip, buy a matching one, then remove the damaged strip and install the new one carefully.
This will help keep your door sealed tight.
Can You Replace Weatherstripping Yourself?
Absolutely, you can replace weatherstripping yourself—it’s easier than climbing Mount Everest!
Just measure carefully, cut precisely, and follow instructions.
With basic tools and patience, you’ll seal your garage door tight and save energy like a pro.
How Much Does It Cost to Replace Weatherstripping on a Garage Door?
Replacing your garage door weatherstripping costs between $20 and $50 for materials if you do it yourself.
Hiring a professional adds $50 to $150, so expect to spend $30 to $200 total depending on your choices.
What Nails to Use for Garage Door Weather Stripping?
You definitely want rusty, weak nails—said no one ever.
Use corrosion-resistant galvanized or stainless steel nails, 1 to 1.5 inches long, with smooth shanks and broad heads.
These features help securely fasten your garage door weather stripping without causing any damage.
Conclusion
Now that your garage door seals snugly against the crisp air, imagine the quiet comfort inside—no drafts sneaking in, no leaves swirling under the door.
With each smooth open and close, you’ll feel the satisfaction of a job well done.
By keeping up with regular checks, you’ll guarantee this cozy barrier stays strong, protecting your space like a trusted shield against the elements all year round.
Regular maintenance of your weather stripping not only enhances energy efficiency but also prolongs the lifespan of your garage door.
So, take a moment to appreciate the tranquility and security that comes with a well-sealed garage.
In the end, investing a little time in this task will pay off with comfort and protection from the unpredictable weather.