7 Steps to Replace Weather Stripping on Your Front Door
To replace your front door’s weatherstripping, you’ll need to gather a few essential tools. Grab a tape measure, a utility knife, and some new weatherstripping.
Once you have everything ready, start by carefully removing the old weatherstripping from the door frame.
Make sure to clean the door frame thoroughly to ensure a good seal.
Now, measure each side of the frame carefully. Cut the new weatherstripping to fit snugly into the frame.
When you’re ready to install, place the new strip firmly in position. Don’t forget to add corner seals for that extra touch of protection!
Finally, take a moment to inspect the seal for any gaps. Test the door movement to ensure everything works smoothly.
Following these steps will help you create a draft-free, energy-efficient home. Plus, there’s more you can do to perfect the seal!
Gather Necessary Tools and Materials
Before you begin replacing your front door’s weather stripping, gather all the necessary tools and materials to make the process smooth and efficient.
Start with safety glasses to protect your eyes during removal and installation. Next, grab a tape measure for accurate measurement of the new weatherstripping length.
Wear safety glasses and use a tape measure for precise weatherstripping removal and installation.
You’ll also need a utility knife or scissors to cut the material precisely. Have a pry bar or a small flat-head screwdriver on hand; these tools will help you gently loosen old weatherstripping or door sweeps without damaging the door frame.
Finally, purchase the correct weatherstripping and door sweep from your local hardware store or online supplier.
Having these tools and materials ready guarantees a straightforward, hassle-free installation process.
Remove the Old Weatherstripping
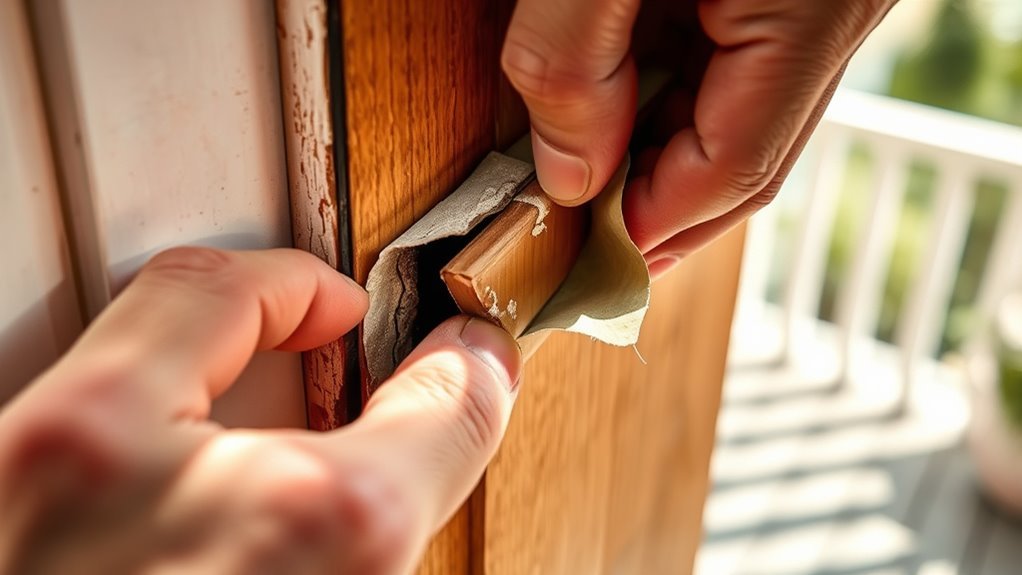
Although it might seem tricky at first, removing the old weatherstripping is a straightforward task if you take your time and protect your eyes with safety glasses.
Start at the top of the door jamb and gently pull the old weatherstripping away.
If it resists, carefully slide a putty knife or pry bar underneath to loosen it without damaging the door frame.
Make sure to remove the entire length of the weatherstripping for a clean surface to install the new seal.
Once removed, dispose of the old weatherstripping properly to keep your workspace tidy, but consider saving any parts that look salvageable.
Wearing safety glasses throughout the process keeps debris from irritating your eyes, making this removal safer and more efficient.
Clean the Door Frame Thoroughly
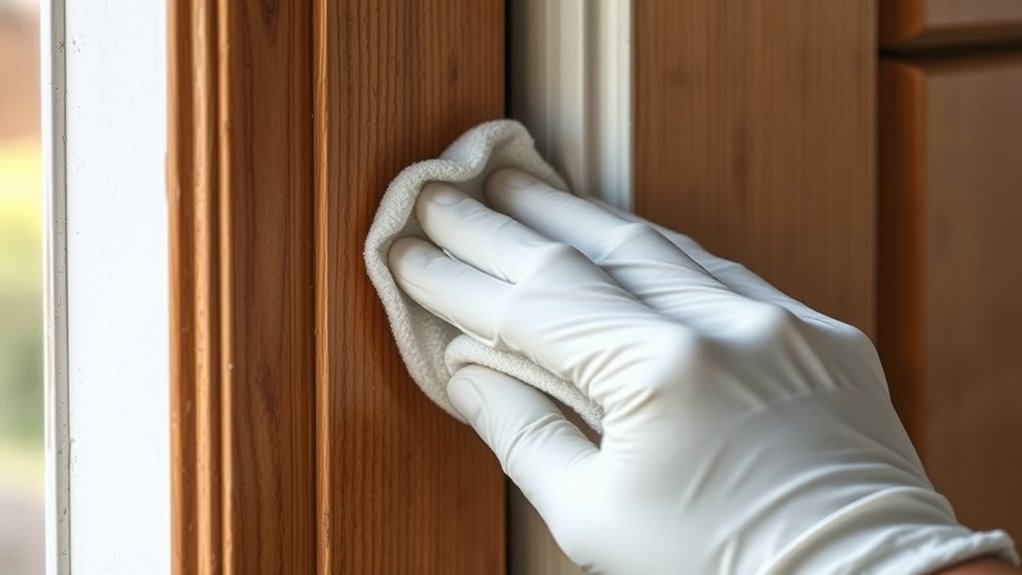
Start by wiping down the door frame with a damp cloth to remove any dirt and debris.
Make sure the surface is completely dry before moving on to the next step.
Take a moment to inspect for any peeling paint or damage that might affect the new weatherstripping’s seal.
Remove Dirt and Debris
When you clean the door frame thoroughly, you guarantee the new weather stripping adheres properly and lasts longer.
Start by removing all dirt and debris to create a clean surface.
Use a damp cloth or mild detergent to wipe down the frame, focusing especially on corners and crevices where dirt tends to build up.
Avoid harsh chemicals or abrasive tools that can damage the surface.
To get rid of loose dirt and debris, use a vacuum with a brush attachment before wiping.
Here’s how to tackle it efficiently:
- Vacuum the door frame, paying attention to tight spots.
- Wipe down with a damp cloth or mild detergent.
- Focus on corners and crevices for stubborn debris.
- Avoid abrasive scrubbers or harsh chemicals.
This prep ensures your weather stripping sticks well and performs best.
Dry Surface Completely
Before installing new weather stripping, it’s essential to ensure the door frame is completely dry. This way, the adhesive sticks properly, and the seal holds tight.
Start by cleaning the surface thoroughly with a cloth and mild detergent. This will remove any dust, dirt, and grease.
Next, use a dry cloth or paper towel to absorb any remaining moisture.
Remember, applying weather stripping on a damp or dirty surface weakens adhesion and can cause peeling.
| Step | Action | Tip |
|---|---|---|
| 1 | Clean door frame | Use mild detergent |
| 2 | Wipe off dirt and grease | Use a clean sponge |
| 3 | Dry surface thoroughly | Use paper towels |
| 4 | Ensure no moisture remains | Check before applying |
Inspect for Damage
Although you’ve cleaned the surface, you should still use a damp cloth or mild cleaner to thoroughly remove any remaining dust, dirt, and debris from the door frame before inspecting it for damage.
This guarantees you don’t miss any issues that could affect the weatherstripping’s performance.
When you inspect the door frame and weatherstripping, focus on these key areas:
- Look for cracks, tears, or peeling in the weatherstripping.
- Check the door frame for gaps, holes, or worn sections.
- Search for signs of water damage or mold on the door frame.
- Ensure the door frame is completely dry and free of residue for proper adhesion.
Careful inspection helps you identify damage early and ensures a proper seal once you replace the weatherstripping.
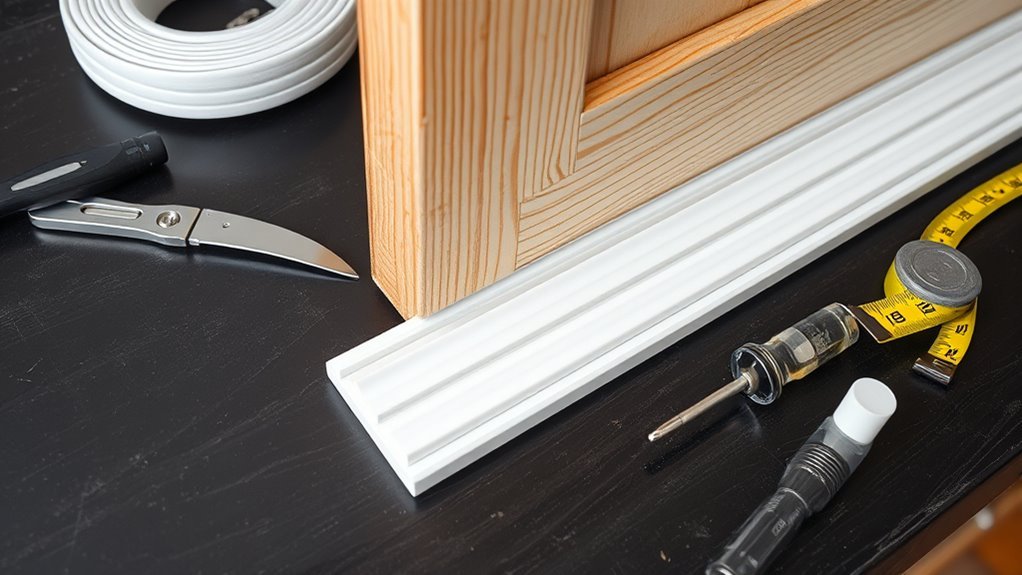
Measure and Cut the New Weatherstripping
Start by measuring each side of your door jamb carefully with a tape measure to get accurate lengths.
Cut the new weatherstripping slightly longer than your measurements, using scissors or a hacksaw for clean, straight edges.
Double-check your marks before trimming to guarantee a perfect fit and a tight seal.
Accurate Measurement Techniques
When you measure the door jamb sections for new weatherstripping, use a tape measure to get the exact length from corner to corner.
Accurate measurement is vital to ensure the weatherstripping fits tightly and seals properly.
For the door sweep at the bottom, measure the door’s width and add about 1/8 inch for a snug fit without interfering with door movement.
Remember these tips for precision:
- Mark the exact measurement on the weatherstripping before you cut.
- Double-check all measurements to avoid gaps or overlaps.
- Use sharp scissors or a hacksaw for clean, straight cuts.
- Dry-fit the cut pieces to confirm they fit perfectly in the groove or along the door edge.
This focus on accuracy will make your installation seamless.
Proper Cutting Methods
Before cutting your new weatherstripping, make sure you measure each door jamb section carefully and add about 1/8 inch for a snug fit.
Use a tape measure to get precise lengths for each part.
If you’re working with foam or felt, grab sharp scissors to cut cleanly.
For thicker materials like vinyl or rubber, use a utility knife or hacksaw to ensure straight edges.
Take your time to cut slowly and steadily, which helps avoid jagged lines or damage.
Double-check your measurements before you cut to prevent mistakes.
By measuring accurately and cutting with care, you’ll achieve precise, straight edges that fit perfectly.
This will ensure your new weatherstripping seals your door effectively.
Install the New Weatherstripping Properly
Although it might seem straightforward, installing the new weatherstripping properly is crucial to guarantee a tight seal and prevent drafts.
For a flawless installation, follow these key steps to ensure your door seal is effective and long-lasting:
- Align the flat edge of the weatherstripping with the groove in the door jamb for a snug fit.
- Press firmly to seat the weatherstripping evenly along the entire length, ensuring strong adhesive contact.
- Check that the weatherstripping sits flush with no gaps or loose spots.
- Test the door’s movement to confirm the new seal doesn’t obstruct opening or closing.
Proper installation maximizes the adhesive’s strength and creates a reliable door seal.
Proper installation ensures strong adhesion and a durable, effective door seal for lasting comfort.
This keeps your home comfortable and energy-efficient.
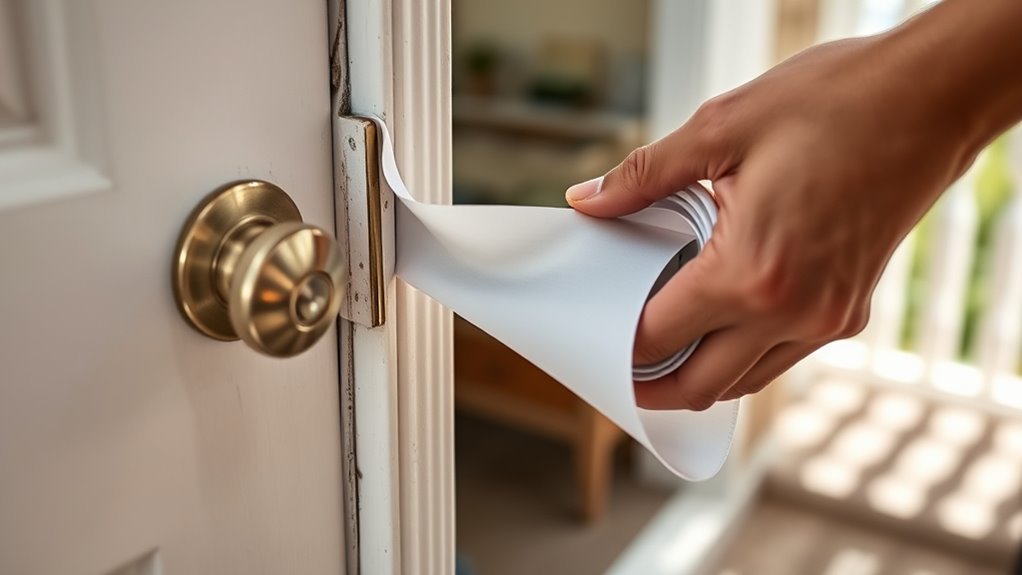
Add Door Corner Seals for Extra Protection
To boost your door’s defense against drafts, add door corner seals at the junctions where the door meets the frame.
These small, adhesive-backed rubber pieces seal tiny gaps that weatherstripping might miss, especially at the bottom corners.
The installation is simple: peel off the backing and stick them in place.
Door corner seals not only improve energy efficiency but also block pests and dirt, extending the life of your weatherstripping.
| Benefit | Explanation |
|---|---|
| Draft Prevention | Seals gaps weatherstripping can’t reach |
| Easy Installation | Peel and stick quickly |
| Pest Barrier | Blocks insects and debris |
| Energy Efficiency Boost | Reduces heat loss |
| Weatherstripping Support | Prolongs primary seal lifespan |
Inspect and Test the Door Seal
When you inspect and test your door seal, focus on detecting any drafts or gaps that let air through.
To verify your weatherstripping is doing its job, carefully inspect the door and look for leaks.
Here’s how you can check:
- Feel around the door edges on a windy day or use a lit incense stick to spot air leaks.
- Look for visible light shining through gaps when the door is closed.
- Examine existing weatherstripping for cracks, peeling, or worn spots.
- Test the door’s closure by sliding a thin paper or tissue along the edges; if it moves easily, the seal isn’t tight.
These steps help you identify where the weatherstripping needs replacement to keep your home energy-efficient and draft-free.
Frequently Asked Questions
Can You Replace the Weather Stripping on a Front Door?
Yes, you can replace the weather stripping on your front door.
Doing so improves insulation, blocks drafts, and boosts energy efficiency.
You’ll just remove the old strip, measure, and install a new one quickly and easily.
Can You Replace Weatherstripping Yourself?
Yes, you can replace weatherstripping yourself easily.
With basic tools and some patience, you’ll improve your door’s seal, boost comfort, and save money.
Just follow instructions carefully and wear gloves for safety.
How Much Does It Cost to Replace Weather Stripping on a Front Door?
Back in the days of knights and castles, replacing weather stripping on your front door costs you between $10 and $50.
You can save more by doing it yourself instead of hiring a pro, who charges extra.
How to Install Front Door Weather Stripping?
You’ll remove old weather stripping, clean the surface, then align and press the new strip firmly into the groove.
Trim excess for a perfect fit.
Make sure it seals well, and test the door closes smoothly.
Conclusion
By replacing your front door’s weatherstripping, you can cut energy loss by up to 10%.
This means saving money on heating and cooling bills.
Following these seven simple steps guarantees a snug seal that keeps drafts out and comfort in.
Don’t overlook the small details like corner seals—they make a big difference.
Once you’ve finished, be sure to test your door.
You’ll enjoy a cozier, more energy-efficient home all year round.
You’ve got this!
In conclusion, upgrading your weatherstripping is an effective way to enhance your home’s energy efficiency.
Not only will you save money on your utility bills, but you’ll also increase comfort by eliminating drafts.
Taking the time to ensure a proper seal, including those often-forgotten corner seals, will significantly impact your living space.
So, roll up your sleeves and get started—your wallet and your home will thank you!