How to Install Weather Stripping on a Garage Door in 3 Easy Steps
Installing weather stripping on your garage door is a simple yet effective way to improve energy efficiency and keep unwanted drafts out. With just a few easy steps, you can ensure a snug fit that will protect your garage from the elements.
Start by raising your garage door and removing any old weather stripping.
Then, clean the bottom channel thoroughly.
Next, measure your door’s edges, mark, and cut the new weather stripping to fit snugly.
Finally, secure it firmly into place using adhesive, screws, or nails.
Close the door to check for any gaps or drafts.
Make sure the seal is tight and properly aligned.
You’ll find helpful tips to perfect the installation with a bit more detail ahead.
Remove Old Weather Stripping and Clean the Surface
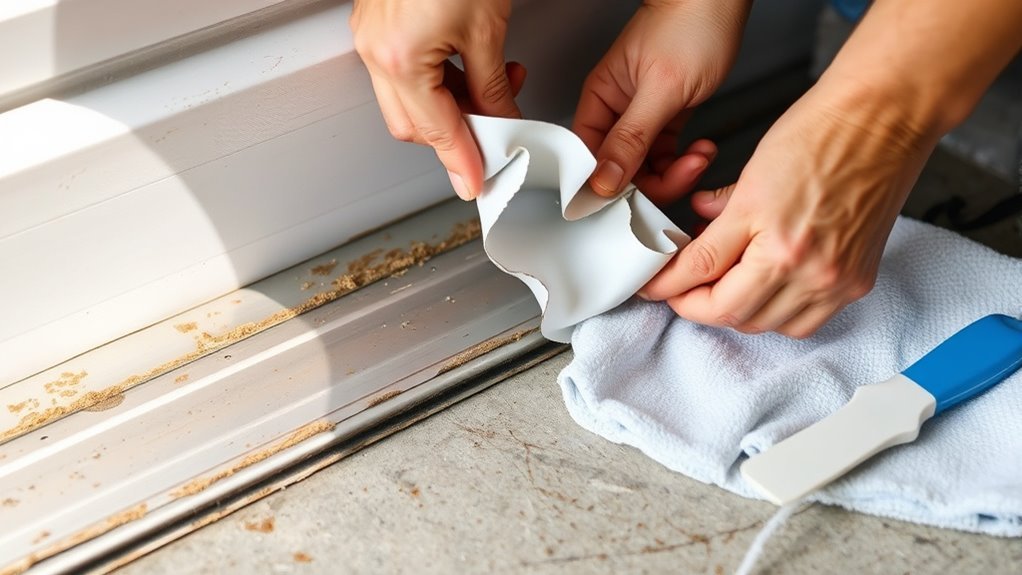
Before you install new weather stripping, you’ll need to remove the old seal and clean the surface thoroughly.
Start by raising your garage door to access the bottom seal easily.
Wear work gloves to protect your hands as you gently pull the worn weather stripping out of the track, applying steady pressure.
If the seal resists, use a putty knife or pry tool to ease it out.
Once you remove the old weather stripping, focus on track cleaning and dirt removal.
Use a damp cloth to wipe the entire bottom channel, removing dirt, debris, and any residual adhesive.
A clean surface helps ensure your new weather stripping will adhere properly.
Following these easy steps sets a solid foundation for a successful installation.
Measure, Cut, and Fit the New Weather Stripping
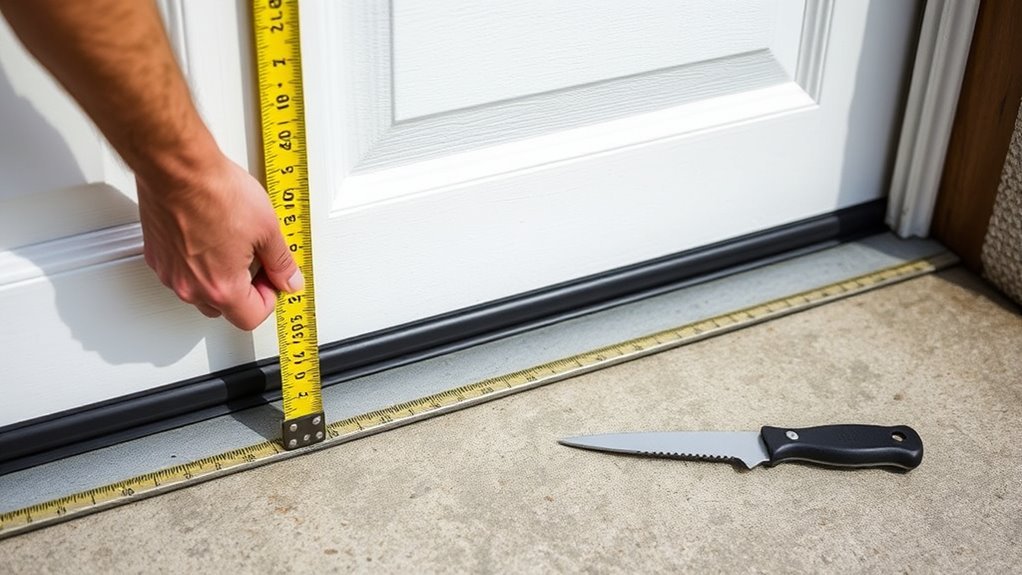
Once you’ve cleaned the surface, measure the length of each garage door edge carefully to determine how much weather stripping you’ll need.
Use a tape measure to get accurate sizes for the top, sides, and bottom edges.
Measure all edges of the garage door carefully for an accurate fit of the weather stripping.
Next, mark these measurements clearly on the new weather stripping material with a pencil or marker.
When cutting, use scissors or a utility knife to ensure clean, straight edges that will provide a snug fit.
After cutting, fit each piece against the door edges to test the size and make sure it aligns properly.
If any section is too long, trim the excess carefully.
A precise measure, cut, and fit process is essential to install weather stripping that seals tightly without gaps or overlaps.
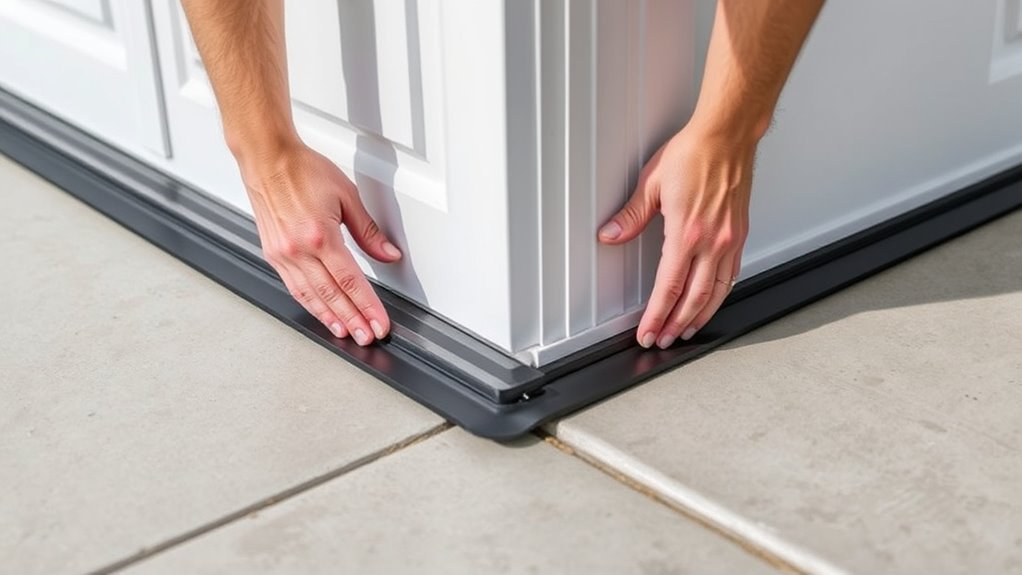
Secure the Weather Stripping and Test the Seal
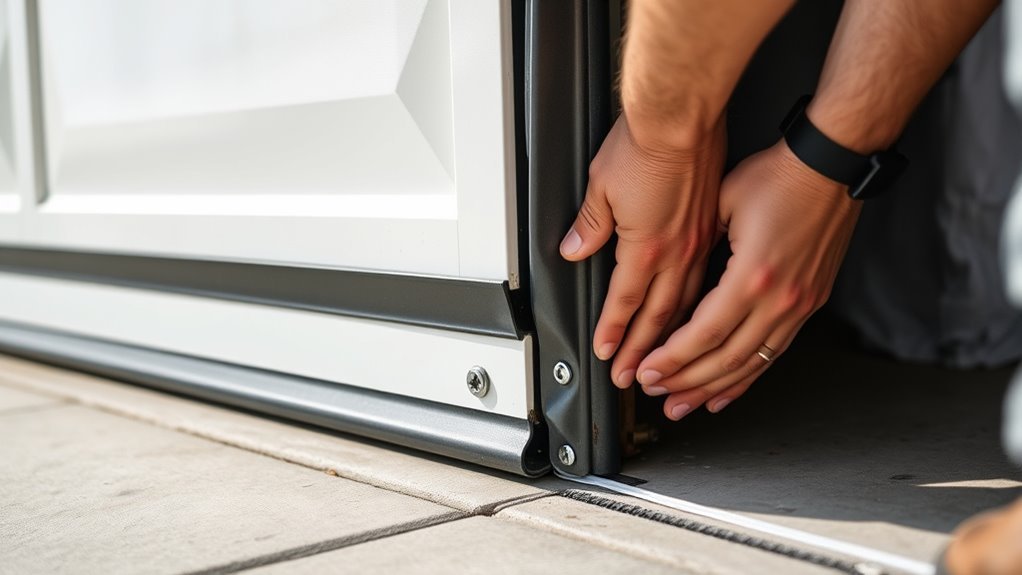
Although fitting the weather stripping properly is essential, you need to secure it firmly to prevent movement or gaps.
Start by pressing the weather stripping into the track or adhesive backing for a tight fit along the length.
Use screws or nails to fasten rubber or vinyl seals at regular intervals, especially on the sides and bottom.
After securing, close the garage door slowly to check for consistent contact with the floor and edges.
Make any necessary adjustments to ensure the seal is flush and even.
Finally, perform a thorough inspection for light leaks or drafts to confirm the weather stripping is properly secured and the seal is effective.
- Press firmly along the entire length to secure the adhesive backing.
- Fasten with screws or nails to prevent movement.
- Inspect for gaps and adjust the fit as needed.
Frequently Asked Questions
How to Fasten Garage Door Weather Stripping?
You fasten garage door weather stripping by applying weather-resistant adhesive.
Then, secure it with evenly spaced nails or screws through pre-drilled holes.
Make sure the strip aligns properly.
Also, reinforce the bottom seal with tracks or screws for a tight fit.
How to Easily Install Weather Stripping?
Think of your garage door as a fortress needing a shield.
You’ll easily install weather stripping by measuring precisely, removing old seals, fitting new strips snugly, and securing them tightly to keep out the invading drafts and moisture.
Can You Weather Strip the Inside of a Garage Door?
Yes, you can weather strip the inside of your garage door, but it’s less effective than outside.
Use adhesive-backed strips or foam seals inside to reduce noise or improve insulation if exterior sealing isn’t possible.
It can be a good temporary solution while you figure out a more permanent fix!
How to Weatherstrip a Door the Right Way?
Like a tailor fitting a suit, you’ll measure precisely, remove old stripping, and cut new material with care.
Then, press it firmly, securing edges tightly to seal out drafts and keep comfort in, cold out.
Conclusion
Now that you’ve wrapped your garage door in fresh weather stripping, picture the gentle hush of rain tapping outside while warmth stays cozily inside.
With the old worn seal gone and the new strip snugly in place, you’ve created a quiet barrier against drafts and dirt.
This simple upgrade not only protects your garage but also brings a comforting peace.
Making every opening and closing feel smooth and secure, you’ve done a great job!
Installing weather stripping on your garage door is a fantastic way to enhance insulation and protect against the elements.
By sealing off gaps, you keep the cold air out and the warm air in.
In doing so, you improve not only the comfort of your garage but also its energy efficiency.
Enjoy the benefits of your hard work every time you use your garage!