10 Tips to Help You Spray Paint in Cold Weather
To spray paint successfully in cold weather, it’s important to follow a few key tips that will help you achieve great results.
First, warm your spray can in hot water and shake it well to ensure the paint flows smoothly.
Make sure to use paint designed for low temperatures, as this will enhance adhesion and drying.
Also, thoroughly clean your surface and warm it to at least 60°F for optimal results.
When applying the paint, opt for several light coats instead of one heavy coat.
This method allows for better drying and reduces the risk of drips.
Remember to allow extra drying time between each coat for the best finish.
Work in a sheltered, wind-free spot or consider creating a heated booth to maintain consistent warmth.
Lastly, always prioritize good ventilation to prevent fumes from building up.
By following these tips, you’ll discover more ways to perfect your cold weather painting project!
Warm Your Spray Can Before Use
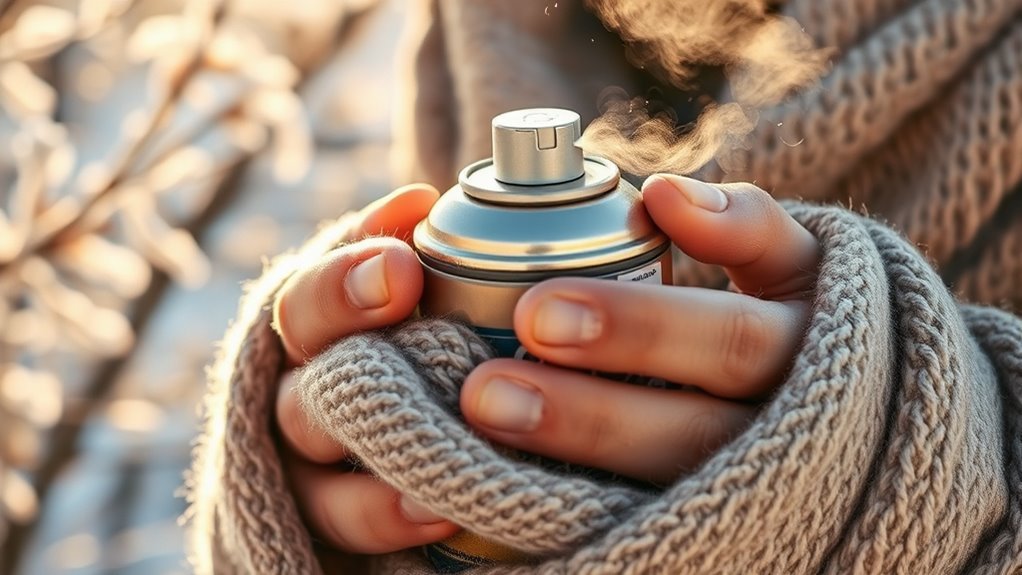
Before you start spray painting in cold weather, warm your spray can by submerging it in hot water around 120°F for 3 to 5 minutes.
This step raises the internal pressure and temperature, helping the paint flow smoothly.
Make sure to keep the can upright during this process to avoid leaks.
After warming, shake it vigorously for at least 2 minutes to evenly distribute the paint and propellant.
I’ve found that testing the spray on a cardboard box before your project ensures consistent coverage.
When painting in the cold, a warm can reduces sputtering and improves finish quality.
If you’re working in a paint booth with the door open, warming the can is even more critical.
Multiple coats will adhere better when the paint needs proper temperature to perform.
Choose the Right Paint for Low Temperatures
Warming your spray can helps, but selecting the right paint for cold weather makes a bigger difference in your results.
I’ve found that oil-based or solvent-based spray paints perform much better in cold conditions, working well down to 40°F.
Unlike water-based paints that need at least 50°F, using hot water to warm your spray can won’t fix poor paint choice.
Look for paints formulated specifically for cold weather—they include additives that improve flow and curing when it’s chilly.
Choose cold-weather paints with additives that enhance flow and curing in low temperatures.
Always check the manufacturer’s specs to confirm the minimum application temperature.
Fast-drying options like polyurethane or specialty cold-weather coatings ensure proper adhesion and curing.
Avoid standard waterborne paints in freezing temps; water can freeze, causing poor film formation and coating failure.
Choosing the right paint saves you time and frustration in the cold.
Prepare and Warm the Surface

Since paint adheres best to a warm, dry surface, you’ll want to prepare and gently heat the area before spraying.
Start by cleaning the surface thoroughly with alcohol to remove dirt and moisture.
Then, warm the surface using one of these methods:
- Use a hairdryer set on low to gently raise the temperature.
- Apply a heat gun or infrared heater to bring the surface to at least 60°F.
- Pre-warm the object indoors or in a heated space to avoid condensation.
- Rinse with hot water beforehand to help eliminate cold spots and promote even heating.
Make sure the surface feels warm to the touch and has no moisture beads before painting.
This ensures better adhesion and a smooth finish in cold weather.
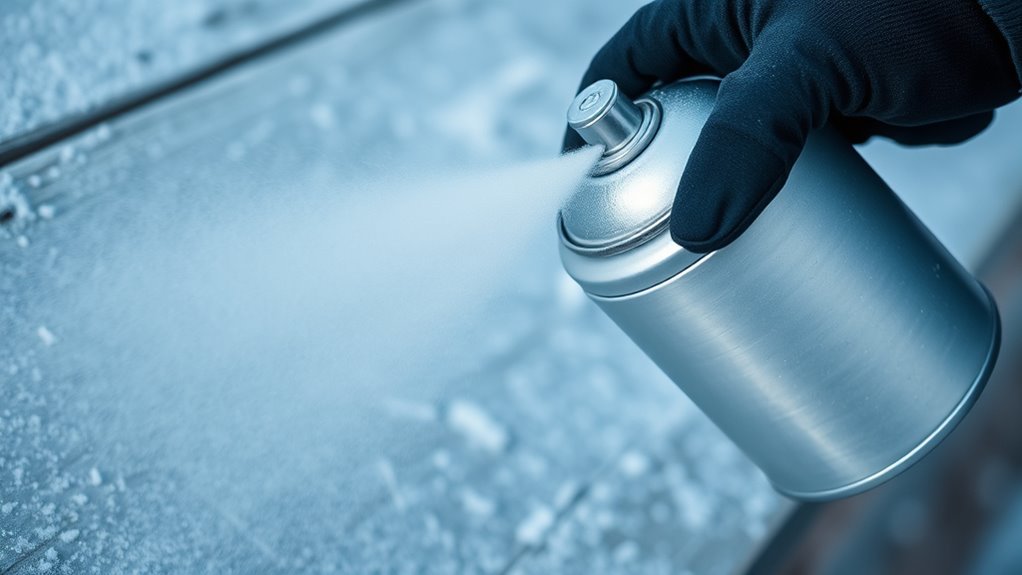
Use Multiple Light Coats Instead of One Heavy Coat
You’ll want to apply several light coats instead of one heavy layer to prevent runs and drips in cold weather.
This approach also helps you achieve even coverage by allowing each coat to dry properly.
Plus, waiting between coats improves paint adhesion for a stronger, longer-lasting finish.
Prevent Runs and Drips
Although cold weather makes paint more fluid and tricky to control, applying multiple light coats instead of one heavy coat helps you prevent runs and drips.
Thick coats in cold conditions are prone to sagging because the paint dries slower, increasing the risk of drips.
By using thin layers, you regulate the paint flow and allow each coat to set properly before adding the next.
To prevent runs and drips:
- Spray light coats to avoid excess buildup.
- Wait a few minutes between coats for proper drying.
- Build coverage gradually for an even finish.
- Avoid heavy overlapping that causes sagging and runs.
Following these steps ensures a smooth, drip-free finish even in chilly weather.
Enhance Even Coverage
When working in cold weather, applying multiple light coats instead of one heavy coat helps you control paint flow and achieve even coverage.
Light coats dry more evenly, reducing runs and drips that happen when paint pools or thick layers dry slowly.
By waiting briefly between each coat, you allow the paint to set just enough for the next layer to bond smoothly, resulting in a consistent finish.
This approach also prevents solvent buildup and uneven texture common in cold temperatures.
Instead of rushing one thick coat, take your time with several thin layers.
This not only improves coverage but also guarantees the paint lays down smoothly, giving your project a professional, uniform look despite the chilly conditions.
Improve Paint Adhesion
Because cold temperatures slow drying times, applying multiple light coats rather than one heavy coat helps your paint adhere properly.
This technique lets solvents evaporate evenly, preventing drips and improving adhesion. Light coats also reduce runs and uneven coverage caused by slow drying.
Waiting between coats ensures each layer bonds well and forms a tough film.
Finally, building coverage gradually avoids trapping moisture or solvents that could weaken adhesion in cold weather.
Here’s how to improve paint adhesion in cold conditions:
- Apply thin, even coats instead of one heavy layer.
- Allow sufficient drying time between coats.
- Avoid over-spraying, which traps moisture or solvents.
- Build up coverage gradually for a smooth, strong finish.
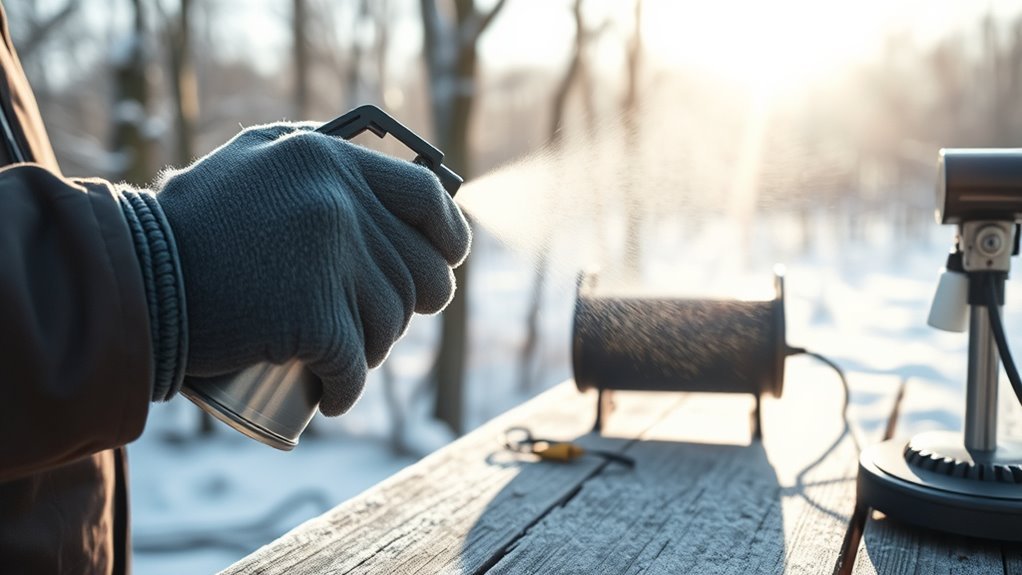
Find a Sheltered, Wind-Free Location
To get the best results, find a sheltered, wind-free spot like a garage or shed where you can block cold drafts and gusts that disrupt your spray pattern.
Position your workspace away from open windows, doors, or vents to avoid airflow or temperature fluctuations.
Use plastic sheeting or a makeshift tent to create an enclosed environment around your project, further shielding it from wind.
Set up a portable heater or heat lamp nearby to maintain a consistent, warm temperature while spraying.
Make sure the area stays well-ventilated to prevent fume buildup but protected from gusts that cause uneven paint application or let in debris.
Taking these steps ensures a smooth, even finish despite cold weather conditions.
Monitor and Control Humidity Levels
Although cold weather poses challenges for spray painting, keeping humidity levels in check is essential for achieving a smooth finish.
High humidity above 85% slows drying and can make surfaces tacky, especially in the cold. Moisture may condense on your paint, causing blushing or dull gloss.
Here’s how you can monitor and control humidity effectively:
- Use a hygrometer to measure humidity precisely.
- Aim to keep humidity between 40-70% for ideal drying.
- Employ a dehumidifier or moisture absorbers in your workspace.
- Be aware that high humidity combined with cold extends drying times, so plan accordingly.
Use a Temporary Heated Paint Booth if Possible
You can create a temporary heated paint booth using a large cardboard box lined with plastic sheeting to keep warmth and contain overspray.
Add a portable heat source like a heat lamp to maintain the temperature above 50°F while painting.
Just be sure to provide proper ventilation to remove fumes without letting cold air in.
Build With Cardboard Box
When cold weather threatens your spray painting project, building a large cardboard box can create a portable, enclosed paint booth that keeps overspray contained and warmth inside.
This simple setup helps you maintain control over your environment and improves paint drying times.
Here’s how to build your cardboard booth:
- Line the box interior with plastic sheeting to prevent paint buildup and ease cleanup.
- Cut ventilation holes or position the box near existing vents to ensure proper airflow and reduce fumes.
- Place small space heaters or heat lamps inside the box to gently raise the temperature.
- Use the booth outdoors or in a well-ventilated area to keep fumes from accumulating indoors.
This approach offers an affordable way to paint effectively in colder conditions.
Add Portable Heat Source
Since cold temperatures can compromise paint adhesion and drying, adding a portable heat source inside a temporary heated paint booth helps maintain a steady temperature above 50°F.
You can use a portable electric heater or heat lamp enclosed with plastic sheeting to trap heat and reduce fluctuations.
A thermostatic heater lets you regulate temperature precisely, preventing paint from freezing or drying too fast.
Consider a heated tent or canopy with a portable heater to shield your work from wind and cold.
Here’s a quick comparison:
| Heat Source | Benefits | Notes |
|---|---|---|
| Electric Heater | Consistent temperature | Use with enclosure |
| Heat Lamp | Targeted warmth | Good for small areas |
| Thermostatic Heater | Precise control | Prevents freezing/drying |
| Heated Tent | Protects from wind & cold | Ideal for outdoor use |
| Portable Space Heater | Easy to move & set up | Ensure safe operation |
Ensure Proper Ventilation
Although cold weather poses challenges for spray painting, guaranteeing proper ventilation is essential to maintain a safe and effective workspace.
Setting up a temporary heated paint booth can help contain overspray and control airflow, especially in cold conditions. Here’s what you should do:
- Create a makeshift booth using a large cardboard box and plastic sheeting to contain fumes and overspray.
- Use existing ventilation like ceiling vents or exhaust fans to remove harmful paint vapors.
- Place a small space heater or heat lamp inside to keep the paint warm and aid curing.
- Regularly monitor airflow and adjust ventilation to prevent fume buildup and maintain air quality.
Following these steps ensures you stay safe and achieve a smooth, even finish even in chilly weather.
Allow Extra Drying and Curing Time
Because cold temperatures slow down solvent evaporation, you’ll need to allow extra drying and curing time for your spray paint to set properly.
In cold weather, plan for at least 24 to 48 hours before handling the painted surface to ensure it fully dries and cures.
The lower temperatures reduce the chemical reactions within the paint film, making extended curing necessary.
If you have access to a safe heat source or a warm environment, you can speed up the drying process.
Just be careful not to overheat, as this can cause damage.
Always check the surface for tackiness or soft spots before touching it.
Being patient with drying times in cold weather will help you achieve a durable, smooth finish without compromising the paint’s quality.
Ensure Proper Ventilation During and After Painting
When you spray paint in cold weather, you’ll want to keep the area well-ventilated to safely disperse fumes and reduce harmful vapors.
Proper airflow helps minimize inhaling volatile organic compounds (VOCs) and cuts down lingering odors.
Here’s how you can guarantee effective ventilation:
- Use exhaust fans, ceiling vents, or open windows to promote constant air exchange.
- Seal your workspace well to prevent cold drafts while allowing fresh, clean air inside.
- Keep ventilation systems running throughout the painting process to avoid fume buildup.
- Continue ventilating for at least 30 minutes after painting to clear residual fumes.
Following these steps keeps your workspace safe and comfortable, even during chilly spray painting sessions.
Test on Scrap Materials Before Applying to Your Project
Once you’ve set up proper ventilation, the next step is to evaluate your spray paint on scrap materials before applying it to your main project.
Testing allows you to see how cold weather impacts paint flow, drying time, and finish quality. Use inexpensive or leftover parts to spot issues like runs, uneven coverage, or poor adhesion caused by low temperatures.
Conduct small test sprays in the actual cold environment to get realistic feedback on performance.
Observe the results carefully and adjust your technique—maybe thin the paint, warm the surface, or allow extra drying time.
Always record your test outcomes so you can compare different methods or paint types.
This preparation ensures you achieve the best possible finish on your valuable or larger pieces.
Frequently Asked Questions
How to Spray Paint in the Cold Weather?
To spray paint in cold weather, warm your spray can and surface.
This helps the paint flow better and adhere properly.
Paint in a sheltered spot to protect it from wind and cold drafts.
Apply thin coats with extra drying time to ensure the best results.
After painting, use gentle heat, like a hairdryer, to help the paint dry and stick properly.
This can make a big difference in the finish!
Is October Too Late to Paint Outside?
Yes, October can be too late to paint outside because temperatures often drop below ideal levels.
You’ll struggle with slower drying, poor adhesion, and unpredictable weather.
How to Keep Spray Paint From Freezing?
Don’t let your spray paint catch a cold—warm the cans in hot water before use,
store them somewhere cozy, and shake well.
These steps keep the paint flowing smoothly,
so you’re not left out in the cold.
Will Paint Cure at 40 Degrees?
Yes, paint can solidify at 40 degrees, but it takes much longer and may not fully cure.
You’ll want to choose specialized paints designed for low temperatures.
Be patient with extended drying times to guarantee durability.
Conclusion
Spray painting in cold weather might seem like battling an icy wind, but with these tips, you’ll turn frost into your ally.
Warm your cans, prepare your surface, and layer your paint like a cozy winter sweater—light and steady.
Find your sheltered nook, be patient with drying, and watch your project bloom despite the chill.
With a little care, your paint job will shine bright, even when the cold tries to dim your creativity.
In conclusion, embracing the cold doesn’t mean compromising on quality.
By following these spray painting tips, you can achieve a beautiful finish, no matter the temperature.
So, gear up, stay warm, and let your creativity flow, even in frosty conditions!