10 Easy Steps to Install a Garage Door Weather Seal
To install a garage door weather seal in 10 easy steps, you’ll need a few essential tools and materials. Start by measuring your door’s width and height to ensure a perfect fit.
Choosing the right seal type based on your climate is crucial for effective insulation.
Next, remove any old weatherstripping that may be worn or damaged.
Before you install the new seal, make sure to clean the door edges and channels thoroughly.
Position the new seal carefully, ensuring it aligns well with the door.
Once it’s in place, secure it properly and trim any excess material.
Finally, test for gaps by closing the door and make any necessary adjustments.
Keep going to discover tips for perfect sealing and longevity, ensuring your garage remains well-protected from the elements!
Gather Necessary Tools and Materials
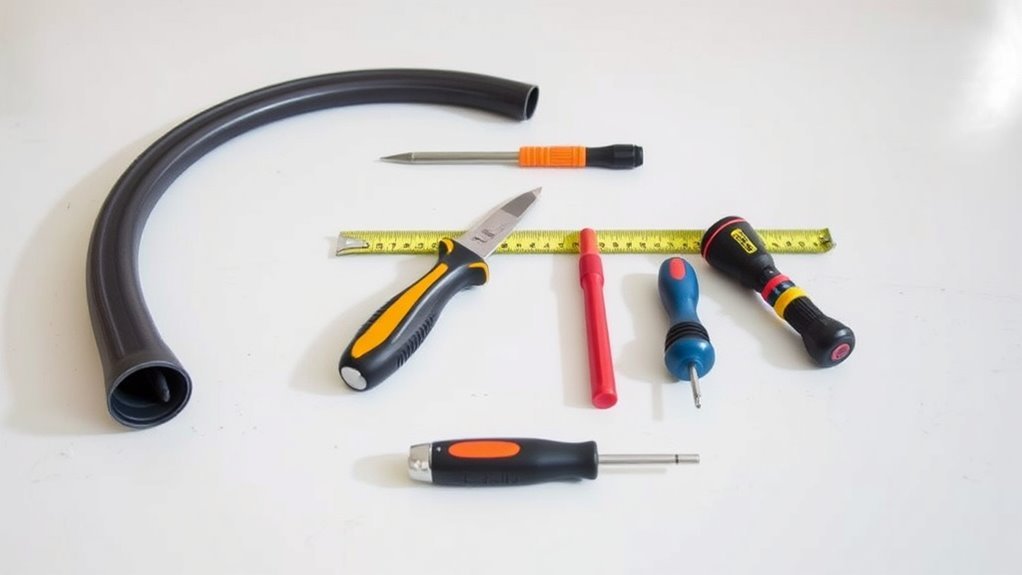
Before you begin, gather all the necessary tools and materials to guarantee a smooth installation.
Start by choosing weatherstripping suitable for your garage door, such as rubber, vinyl, or foam strips, depending on your climate and door type.
Next, collect essential tools: a tape measure, utility knife or scissors, drill or hammer, nails or screws, and a cleaning cloth.
You’ll also want protective gloves and safety glasses to stay safe during cutting and installation.
Prepare cleaning supplies like a rag and cleaning solution to remove dirt, dust, and old sealant from the door edges.
Having everything ready assures you can accurately measure and apply the weatherstripping without interruptions, making the whole process more efficient and straightforward.
Measure Your Garage Door Dimensions
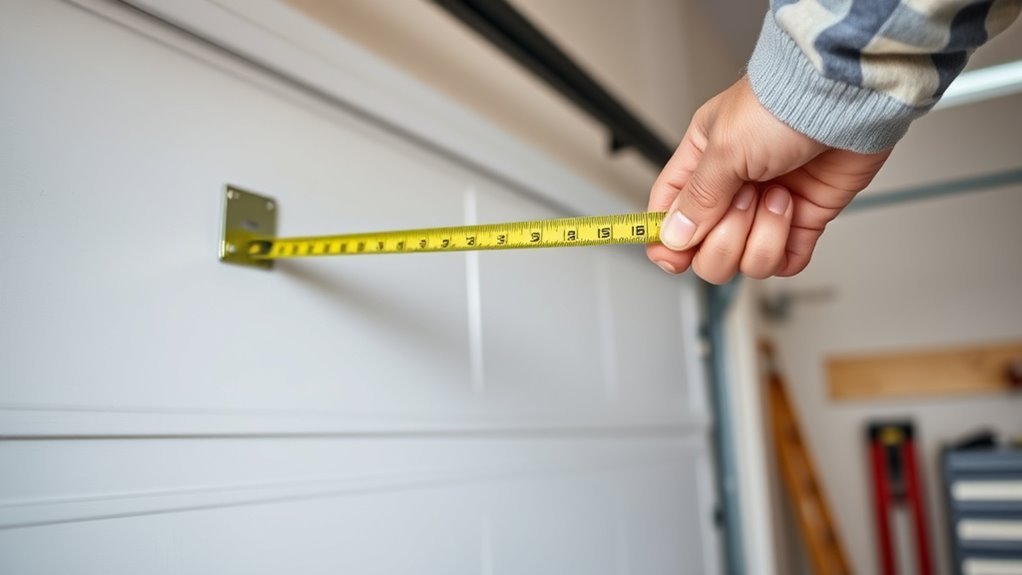
When you measure your garage door dimensions, take the width from jamb to jamb at the top, middle, and bottom to guarantee accuracy.
This assures your weather seal fits perfectly without gaps.
Next, measure the height from the bottom edge to the top, noting any uneven spots that might affect seal placement.
Measure the door height carefully, noting uneven areas that could impact how the seal fits.
Check for gaps along the sides, top, and bottom when the door is fully closed to identify areas needing the most sealing.
Use a tape measure to determine the length of weatherstripping required for each edge, adding a small allowance for trimming.
Finally, measure the depth of the channels or grooves where the seal will be installed to choose compatible materials and guarantee a snug fit.
Accurate measurements make installation easier and more effective.
Choose the Appropriate Weather Seal Type
Before you buy, consider the types of weather seals available—rubber, vinyl, and foam each offer different durability levels.
Rubber is great for heavy-duty sealing, while vinyl balances flexibility and weather resistance.
Foam works for smaller gaps or temporary fixes.
Choosing the right material based on your climate and door needs will guarantee your seal lasts longer and keeps out drafts effectively.
Types of Weather Seals
How do you know which weather seal fits your garage door best?
When you install garage door weatherstripping, consider the type that matches your climate and door gaps.
Rubber door seals are flexible and durable, perfect for extreme temperatures and long-term use.
Vinyl seals offer a softer, pliable option that hugs door edges well, ideal for moderate climates.
Foam weatherstripping is lightweight and budget-friendly but wears out faster, needing frequent replacement.
Dual-vinyl top and side weatherstrips provide extra protection against drafts, dust, insects, and debris.
Choosing the right garage door weatherstripping ensures a tight seal, keeping your garage comfortable and clean.
Evaluate your garage’s specific needs before you install garage door weatherstripping to get the best fit and performance.
Material Durability Comparison
Since durability varies widely among materials, choosing the right weather seal for your garage door depends on how long you want it to last and the conditions it will face.
Here’s a quick comparison to help you decide:
- Rubber seals offer excellent durability, lasting 5-10 years. They stay flexible and resist extreme temperatures, making them ideal for fluctuating climates.
- Vinyl seals are durable but tend to become brittle or crack after 3-7 years, especially with prolonged sun exposure.
- Foam seals have the shortest lifespan, typically 1-3 years, as they compress and deteriorate faster.
If you want a seal that maintains its effectiveness over time, rubber is usually your best bet.
Vinyl is a decent mid-range option, while foam is better for short-term needs.
Seal Selection Criteria
Understanding the durability differences among rubber, vinyl, and foam seals helps you narrow down which material suits your garage door best.
For your garage door installation, choose a weather seal made of sturdy materials like rubber or vinyl to guarantee flexibility and resistance to weather conditions.
Measure the gaps around your door carefully; selecting a seal that matches these dimensions prevents drafts and water from entering.
Look for seals with a flexible flap that lightly contacts the door surface. This allows smooth operation without rubbing or damage.
Prioritize weather seals designed specifically for garage doors. They often feature vinyl or rubber flaps with adhesive backing or an installation track.
If you live in extreme climates, opt for rubber seals, as they maintain their integrity better year-round.
These criteria will guide you to the perfect weather seal for effective installation.
Remove the Old Weatherstripping
Before you install the new weather seal, you’ll need to remove the old weatherstripping carefully.
Start by wearing work gloves to protect your hands throughout the process.
Always wear work gloves to keep your hands safe while removing old weatherstripping.
Then, position your garage door open for easy access to the bottom seal.
To remove the old weatherstripping efficiently, follow these steps:
- Gently pull the existing weatherstripping away from the metal track, applying steady pressure.
- If you encounter resistance, use a pry tool to loosen stubborn sections without damaging the door.
- Ensure you remove the entire old seal before moving on to the next step.
Taking your time to remove all the old weatherstripping will help the new seal fit properly and work effectively.
Clean the Garage Door Edges and Channels
Although you’ve removed the old weatherstripping, you’ll need to thoroughly clean the garage door edges and channels to guarantee the new seal adheres properly and functions well.
Start by using a scraper or putty knife to remove any leftover residue or old weatherstripping.
Then, take a clean, dry rag to wipe down the entire bottom edge and side channels, removing dirt, dust, and debris.
Apply a mild detergent or specialized garage door cleaner to tackle grease and grime that could affect adhesion.
Afterward, rinse the channels with water or wipe with a damp cloth to eliminate any residue.
Make sure to dry everything thoroughly with a clean towel.
Regularly cleaning these areas as part of garage door maintenance every 6 to 12 months helps ensure your weatherstripping stays effective and easy to install.
Cut the New Weather Seal to Size
Once you’ve measured the length of each side of your garage door opening, add a little extra to make certain the weather seal provides full coverage.
Next, it’s time to cut the new weather seal to size accurately.
- Measure again and mark the cut points on the weather seal with a pencil or marker.
- Cut carefully using sharp scissors, a utility knife, or a hacksaw for a clean, straight edge.
- For rounded corners, use a miter box or guide to achieve precise angled cuts.
Taking these steps will ensure that your weather seal fits perfectly!
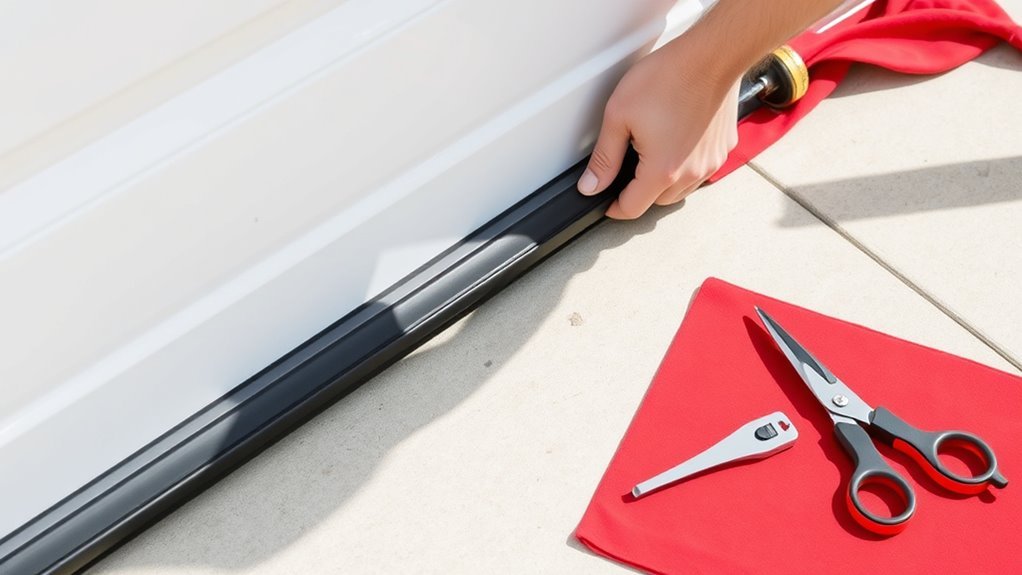
Position the Weather Seal on the Door
Now that you’ve cut the seal to size, it’s important to position it correctly on the door.
Make sure the seal is aligned parallel to the bottom edge and sits about three inches away to avoid rubbing.
Check that the flexible flap lightly touches the door when closed and moves freely when opened, adjusting as needed.
Align Seal Properly
Start by positioning the weather seal so its flexible vinyl flap lightly touches the garage door without pressing too hard. Proper seal alignment is vital for effective installation and long-lasting performance.
Follow these steps to get it right:
- Make sure the seal’s edge runs parallel to the door’s bottom edge to maintain uniform contact and smooth operation.
- Use temporary nails, tape, or markers to hold the seal in place, allowing you to check the alignment before final fastening.
- Confirm the seal is about 3 inches away from the door surface when closed, so it seals well without causing friction or damage.
Taking your time to align everything properly will pay off in the long run!
Adjust for Door Movement
Although proper alignment sets a strong foundation, you’ll need to modify the weather seal to accommodate your garage door’s movement.
Position the seal so it lightly contacts the closed door. This avoids excessive pressure that could hinder operation.
Now, adjust the seal placement to ensure it moves away as the door opens, preventing any rubbing.
To hold the seal in place during testing, you can use temporary nails or tape.
Close and open the door multiple times, fine-tuning the seal to maintain a snug fit without impeding the door cycle.
Lastly, ensure the seal’s angle aligns around 70° for smooth movement.
| Step | Action | Purpose |
|---|---|---|
| Position Seal | Light contact on closed door | Avoids pressure on door |
| Adjust Placement | Moves away when opening | Prevents rubbing/damage |
| Test & Fine-tune | Open/close door repeatedly | Ensures smooth door cycle |
Secure the Weather Seal Properly
Before you secure the weather seal, make sure it lines up perfectly with the bottom edge of your garage door.
Proper alignment guarantees an effective seal and prevents gaps.
To secure your weather seal properly, follow these steps:
- Choose suitable fasteners like nails, screws, or adhesive strips that won’t damage your garage door.
- Press the weather seal evenly against the door’s bottom edge to ensure consistent contact.
- Confirm the flexible part of the seal can move freely when the door opens and closes, avoiding over-tightening.
After securing, regularly inspect the seal to maintain a tight fit and maximum protection.
This way, you’ll keep your garage door well-sealed against drafts, moisture, and pests.
Trim Any Excess Weatherstripping
How do you guarantee your weatherstripping fits perfectly without leaving gaps?
Start by trimming any excess weatherstripping, leaving about 1/2 inch on each side for a snug seal.
Use electric scissors or a sharp utility knife to carefully trim the weatherstripping, making sure to cut straight and even.
This prevents misalignment and ensures the seal sits flush against your garage door edges.
After trimming, remove any jagged edges or frayed material to maintain a clean, professional finish.
Finally, double-check that the weatherstripping is properly aligned and securely positioned.
Taking these steps ensures your garage door seal fits perfectly, providing effective protection against drafts and moisture without compromising durability or appearance.
Test the Garage Door Seal and Adjust as Needed
Once the seal is in place, close your garage door and check for any gaps or uneven contact along the bottom edge.
Use a flashlight to spot light leaks that indicate where the seal might not be tight enough.
If you find any issues, adjust the seal’s position to guarantee a snug, even fit without blocking door movement.
Check for Gaps
Where can gaps sneak into your garage door seal?
Gaps often appear along the bottom, sides, and top edges of your garage door seal, compromising your weather stripping’s effectiveness.
To check for these gaps, follow these steps:
- Close the garage door and inspect all edges for visible gaps or light leaks.
- Slide a dollar bill or piece of paper between the door and seal at contact points; pull gently to test resistance.
- If the paper slips easily or gaps are visible, adjust the seal so it fits snugly without pressing too hard.
After adjustments, open and close the door a few times to ensure the seal moves correctly and remains tight.
Regularly checking for gaps helps uphold a weather-tight garage door seal and keeps your space protected.
Inspect Light Leaks
Although you’ve checked for gaps, it’s essential to inspect for light leaks by closing your garage door and looking closely along the edges.
Use a flashlight or laser pointer in dark conditions to spot light leaks easily. Any visible light means the garage door seal isn’t fully tight.
Make small adjustments by loosening and repositioning the seal to eliminate gaps. After adjustments, close the door again and recheck for leaks.
Repeat this test regularly, especially after weather changes or repairs, to keep your seal effective.
| Step | Action |
|---|---|
| 1 | Close garage door |
| 2 | Look for light leaks |
| 3 | Use flashlight if needed |
| 4 | Make seal adjustments |
| 5 | Recheck for leaks after adjust |
Adjust Seal Position
Before finalizing the seal installation, close your garage door and carefully check where the weather seal touches the door. This will help ensure it creates a tight, even fit without causing rubbing or leaving gaps.
To properly adjust the seal position, follow these steps:
- Gently press the seal against the door to test its fit. If it rubs or leaves gaps, mark the spot with a pencil or chalk for reference.
- Reopen the door and reposition the seal on the jamb or track so it only contacts the door when fully closed. This way, it won’t interfere during operation.
- Make small adjustments to the seal’s angle or height until it fits snugly. You want to make sure it creates a secure seal without resistance.
Adjusting the seal correctly ensures your garage stays protected from drafts and moisture.
Frequently Asked Questions
What Nails to Use for Garage Door Weather Stripping?
You should use corrosion-resistant nails like galvanized or stainless steel, 1 to 1.5 inches long.
For vinyl or rubber seals, ring-shank nails work best.
Choose finishing nails for a cleaner look and easy future removal.
How to Install Rubber Weather Stripping Around a Door?
You’ll measure the door edges, cut the rubber strip to size, and clean the surface.
Next, peel off the adhesive backing, then press the strip firmly along the edges.
Make sure to adjust it so it seals without hindering door movement.
What to Use to Secure a Garage Door Seal?
You should use adhesive-backed weatherstripping or a weather-resistant sealant to secure the garage door seal.
For rubber or vinyl seals, fasten them with nails, screws, or specialized clips to guarantee a strong, lasting attachment.
How to Install MD Bottom Garage Door Seal?
Measure, cut, remove, clean, insert, trim, and adjust—start by measuring your garage door’s bottom edge.
Cut the MD seal to the appropriate length, then remove the old one.
Next, clean the channel thoroughly.
Now, insert the new seal carefully and ensure it fits well.
Finally, trim and adjust as needed for a perfect fit.
Conclusion
Installing a garage door weather seal might seem tricky at first, but you’ll find it’s straightforward with these easy steps.
Even if you’re worried about making mistakes, remember that trimming and adjusting the seal is simple.
You can perfect the fit as you go. Taking the time to seal your garage door properly not only keeps out drafts and pests but also saves energy.
It protects your belongings, making it well worth the effort.
In conclusion, a properly installed garage door weather seal is essential for maintaining a comfortable and energy-efficient garage space.
By following these easy steps, you can ensure that your garage is protected from outside elements.
So, don’t hesitate to take on this DIY project; it’s a small investment that pays off in comfort and protection.